I never imagined the day would come when I would be traveling to Japan. There are few reasons why Japan wasn’t in my bucket list:
- I heard things about Japan being an expensive place to visit, and probably the most expensive place to travel in Southeast Asia especially coming from the Philippines.
- I haven’t solo traveled outside the country. We all know that Japan isn’t as easy to solo travel as any other Asian countries and for solo travelers who have tight budget (and for Filipinos) might be quite challenging as Japan is also quite frankly an expensive place to be comparing again to other Asian countries.
- I heard and I read about the complicated railway system of Japan due to a few private companies operating the railways.
Lastly, I thought that there’s nothing much to see in Japan but the cherry blossoms for which they are known (but going there during cherry blossom season is fairly expensive) and shopping (gadgets and electronic stuff).
While I am not really fond of shopping when traveling abroad, it didn’t come to me about going there. Until then, I’ve had a few people tell me that all I thought about Japan wasn’t really true and that it’s not that expensive traveling there, that if you just follow the guidelines in the railway, you wouldn’t get lost and that there is so much to see and do other than cherry blossoms and shopping.
I admit, I am not a super budget traveler. But I do budget when traveling. It’s just that I don’t have the patience to book for a seat sale. As long as I think that the airfare is worth it then I book for the trip. That’s why, in this Japan trip, my round trip airfare from Cebu to Kansai International Airport (Osaka) costs almost 12,000php already. Although, if you’re based in Manila, the airfare will be way cheaper and could save you a lot of money and/or if you’re patient enough to wait for a seat sale.
So, it came to a point that I challenged myself to travel solo outside the country for the first time and Japan is the destination of choice. Admittedly, I almost gave up in pushing through with this trip because, when I researched about the places to go to, the transportation I needed to use all seemed indeed complicated. But I told myself “I can do this. It’s going to be an adventure.” I guess getting lost also will be an adventure. Hahaha! I just needed time to research all the necessary things that I need to know about Japan (the places I want to visit, where to stay, the mode of transportation and what to eat). Those are the basic things that I needed to know to get me started.
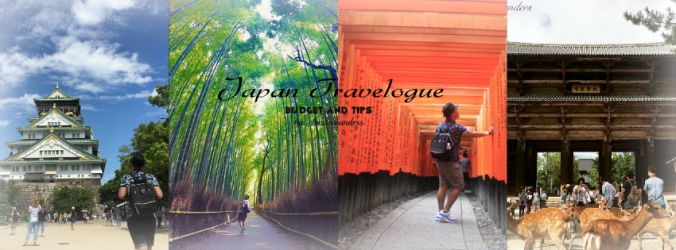
My first decision was to travel to Tokyo then Hakone to see the Mt.Fuji. But it all changed when I found out that I have a small chance of seeing Mt. Fuji without the clouds blocking its grandeur. I made further research then I read that Kansai Region, Japan has a lot of sightseeing spots and not to mention tons of food to eat. (Exciting! Hahaha!)😉😊 . Not to mention the bowing deer in Nara. So I opted and decided that I’ll travel to Kansai Region, Japan. Visiting 3 cities: Kyoto, Nara and Osaka respectively. Since those are the places that seemed to have the things that I wanted to see and do.
I finally managed to put everything up, piece by piece, and made the best itinerary I can possibly make.
First, you needed to apply for a Japan visa if you’re coming from the Philippines. Please refer here on how to apply for a Japan visa.
I had mine processed at Friendship Tours in Cebu. They are the only accredited agency to process the Japan visa directly in Cebu. Friendship Tours is located in the Oakridge, Banilad, Cebu.
MY TOTAL ALL IN EXPENSE: Php 30,672.00
Details of expenses:
- 1,200 Php- Japan Visa processing Fee. Have your visa be processed in Friendship Tours in the Oakridge, Banilad, Cebu
- 11,536 Php – Total round trip airfare from Cebu-Manila-Osaka-Manila- Cebu including 15kgs return check- in baggage (Cebu Pacific)
- 4,696.00 Php- Hostel (3 nights in Kyoto, 1 night in Osaka). Booked my hostels in Agoda.com
- 3,000 Php- Total transportation allowance (train and bus)
- 1,670 Php – Tourist Data SIM card
- 4, 000 Php- Total food allowance for an all-out Japan Food trip.
- 500 Php– Entrance fee allowances to temples.
- 1,620 Php- Travel tax
- 2,000 Php- Souvenir Allowance
- 450 Php – Taxi fare round trip Mactan-Cebu Int’l airport
NOTE and TIPS:
- Everything can be reduced in cost especially the airfare. I am from Cebu so I still needed to book a flight from Cebu to Manila since there is no direct flight from Cebu to Osaka (Kansai International Airport).
- The food allowance can also be reduced if you’re not the foodie type. I went all out in eating all the Japanese food that I wanted to try. That’s the reason for the big cost. Budget food cost in Japan ranges from 100 JPY -500JPY. You can stick with convenience store food which is cheaper (7/11, Family Mart, Mini Stop).
- For my souvenir allowance, I was able to buy an Airport Limited edition Starbucks Tumbler, 1 Uncle Rikuro cheesecake, 1 Pablo cheesecake, 1 bottle of sweet sake, 1 Japanese transparent umbrella and a few boxes of Royce Chocolate and Mathca Kitkats.
- You can change your USD to JPY in the Airport. I had mine changed in NAIA 3.
- Ask when in doubt. The Japanese are very hospitable, honest and helpful. Although most Japanese dont know how to speak English, they will do their best to help you.
- Buy a tourist SIM card with data. This is very crucial as you will be using Google map and Hyperdia always in order for you to know what to ride and the time table of your mode of transportation.
- Use Google Map and Hyperdia in your mobile every time you ride a train or bus. These apps will tell you or advice you the best route to your destination, what to take and the train time schedules. Google Map will be very useful especially in locating the tourist spots. If ever I did not put how to locate the place in this blog, remember to just use your Google Map. Google Map is pretty accurate in Japan.
- The budget does not include shopping. I’m not fond of shopping when traveling outside the country. I’m foodie and a sightseer.
Flight details:
- Departure date from Cebu: September 6,2016 –> 3:05PM-7:55PM
- Departure date from Japan: September 10,2016 –> 8:40PM- 11:50PM
So let’s get the details started.!!
Sept.6- Arrival to Kyoto
Headed straight to Kyoto
If you are traveling from Kansai International Airport to Kyoto, then your first stop may be the Travel Desk of Kansai Tourist Information Center. This is located on the first floor of the Terminal 1 building. Inquire where you can buy the ICOCA Card + 1 way Haruka Express train going to Kyoto.
Upon exiting to the arrival hall, buy a data tourist SIM card in a vending machine located at the right side of the wing when you get out of the arrival area. It costs 3,500 JPY for 30 days with 1.5 GB data. This will be more than sufficient in your 5 day tour. Be sure to read the instructions carefully in activating the card. You need an internet to activate the card. Just use the airport’s wifi or the JR Station’s (the station is on the 2nd floor adjacent to the Kansai Airport. You may ask the Travel Information desk for direction) wifi.
After registering your Sim card, go to the 2nd floor and head to the other building (this is the JR Train station). Get ICOCA card + Haruka One way pass in the JR Office (one way only to Kyoto) for 3,600 JPY.(1,600 for the Haruka, 1,500 credit on your ICOCA and 500 deposit). Just have your card charge an additional 2,000 JPY in advance. A total of 5,600 JPY. There will be signs leading you to the JR Office.
Please refer here about ICOCA card Information.
After getting yout ICOCA Card. Ride HARUKA TRAIN to Kyoto. Train station entrance is infront of the JR Office. Try to look for the TV Screen outside the office for the Haruka train departure schedule. You may also ask attendant in the JR Office.
When you arrive at Kyoto, check in at your hostel/ hotel. Mine was K’s House Kyoto – Backpackers Hostel. I chose to stay in this hostel mainly because of the good feedback it had from Agoda.com. Address: 418 Nayacho, Shichijo-agaru, Dotemachi-dori, Shimogyo-ku, Kyoto, Japan
How to get to hotel from Kyoto station:
This hostel can easily be negotiated on foot from Kyoto Station. Just go out from the Central exit of JR Kyoto Station, cross the street towards Kyoto Tower and walk along Karasuma-dori (the street on the east-side road of Kyoto Tower, near Starbucks). Turn right at the intersection of Shichijo-dori and Karasuma-dori and walk for about 5 minutes until you reach Kawaramachi-dori. Cross a signal and then turn left on the first street along Kawaramachi-dori. You will find K’s House (white building) and Zen Café on the road to your right. Or you may just just use your Google Map to locate your Hostel/Hotel.
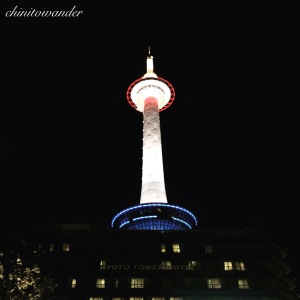
Kyoto Tower
After checking in, tell the receptionist that you want to Get a One Day unlimited bus Pass for 500JPY. This bus pass is all you need for your Kyoto Tour the next day. Ask for any advice for your next day’s itinerary about what bus to ride. This will help you get started. Also ask for a Bus Map and Kyoto City map.
-sleep
Sept.7: Arashiyama Bamboo Forest, Arashiyama Monkey Park & Temple Run (Ninna-ji Temple, Kinkakuji Temple), Nijo Castle & Dinner at Fire Ramen (Menbakaichidai Fire Ramen)
Woke up early and proceeded to Arashiyama Bamboo Forest. I woke up around 6:30am and left the hostel around 7am. I want to be early to avoid the crowd of tourists who might spoil my photos with lots of photobombers. Lol.😁
- Address: 〒616-0000 Kyoto, Kyoto Prefecture Ukyo ward Arashiyama
- Access: go to Kyoto Station by taking a bus just beside the hostel and take the JR Train (San-In Line). After alighting, it will be a 10-minute walk from Saga Arashiyama Station on San-In Line.


After I load my self with tons of photo ops.😂 I walk myself to Arashiyama Monkey Park Iwatayama. This is the place where you get to see the Japanese macaque, the only monkey specie you could find in Japan.
- Address: 8 Arashiyama Genrokuyama-cho, Nishikyo Ward, Kyoto City, Kyoto Prefecture 616-0007
- Access: around 10 minutes walk from bamboo forest. If just follow your Google Map.


If you had enough with the place already. You may now PROCEED TO TEMPLE RUN:
Temple Run –all temples can be reached via bus.
My first stop was, Ninna-ji Temple 【World Heritage】(pagoda), –free entrance
- Address: 33 Omuroouchi, Ukyo Ward, Kyoto City, Kyoto Prefecture 616-8092
- Access: Take city bus from JR Kyoto Station and get off at Omuroninnaji-mae bus stop. 2-minute walk from Keifuku Omuroninnaji Station. If you are coming from other parts of the city, just follow the bus route and check which numbers are stopping at the same bus stop.


Second is, Kinkakuji temple (golden palace) –400JPY entrance fee
- Address: 1 Kinkakujicho, Kita Ward, Kyoto, Kyoto Prefecture 603-8361, Japan
- Access: Take bus numbers 101 or 205 from Kyoto Station to the Kinkaku-ji Michi bus stop. If you are coming from other parts of the city, just follow the bus route and check which numbers are stopping at the same bus stop.


Headed to Nijo Castle after Kinkakuji Temple. Refer to your bus map or google map to get there. To my dismay, the castle was closed at that time due to some reconstruction. Oh well, just don’t forget to include this in your itinerary. I read that its wonderful inside the castle. By the way, on regular days, the castle ticket office closes at 4pm. So be sure to go there before it closes.
Temples are pretty much looks the same for me that’s why I only opted to visit two temples and the castle. Also, my feet were getting tired from all the walking but they were a sight to behold.
After visiting Nijo Palace, walk to Menbakaichidai Fire Ramen for dinner then went back to the hostel and called it a day.
Menbakaichidai Fire Ramen: Chinitoeats: My Fiery Ramen Experience. Definitely not to be missed!
Sept.8: Fushima Inari Taisha, Nara Half day tour & Gion District
Still the same routine. I woke up early in order for me to have good photo ops at the location as this place gets pretty crowded when it’s getting late just like the bamboo forest.😁😆😅
First stop was Inari shrine. Fushimi Inari Taisha in google map
- Address: 68 Fukakusa Yabunochi-cho, Fushimi ward, Kyoto city, Kyoto Prefecture 612-0882
- Access: go to Gion Shichijo Station (keihan Line) à Keihan Railway Fushimi Inari Station.. it’s a 5-minute walk after getting off at Keihan Railway Fushimi Inari Station- ticket price 150JPY


It was raining that day and I was just lucky that some foreigner offered to take me back to the main entrance because I was stuck in the rest room area for nearly an hour, waiting for the rain to stop. And yes, when we arrived back at the entrance, the rain stopped. Darn! I was very thankful for her. Thank you, Christine. That was her name.😊😊😐😐


Because I don’t want to get wet anymore, I bought an umbrella. And guess what, after I bought the umbrella, it didn’t rain ever since then. Darn again! Hahaha. Well, I just carried it with me and brought it back home to remind me of that day. Hehehe.😂😅😐😐
After that, I rested for a while and ate a king crab meat in a stall. Then I went my way off to Nara.😋


I’m excited that I’ll be seeing free-roaming deers!!! Weeeeh!!😜
Visiting Nara:
How to get to Nara from Inari Shrine:
From Keihan Railway Fushimi Inari Station (keihan Line-Yodoabashi) -à Tambabashi Station… then transfer to Kintetsu-Tambabashi Station using Kintetsu- Kyoto Line NOT THE LIMITED EXPRESS as limited express is not applicable to your ICOCA Card (kintetsu Nara) and arrive in Kintetsu Nara Station.
Once in Nara, you’ll most likely start this itinerary at Kintetsu Nara Station. Get yourself to the fountain just up the stairs from Kintetsu Nara Station to begin this walk.


- Start from Kintetsu Nara Station and walk up Nobori-oji Street. You’ll start to encounter Nara’s famous sacred deers as you go.
- Use the underground crossings to get to the northeast corner of the Nobori-oji/Route 169. Walk from there to Isui-en Garden. — cost 900 JPY entrance
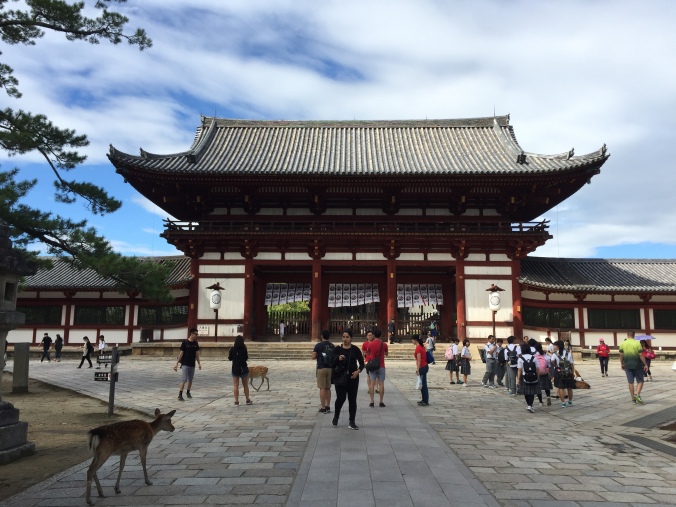
- Walk from Isui-en along the backstreets to Todai-ji Temple. Before entering the Daibutsu-den Hall to see the Great Buddha (Daibutsu), walk a little south to check out the Nandai-mon Gate, with its two huge guardian figures.
- Take your time marveling at the Daibutsu and then exit Daibutsu-den. Walk along the east wall of the Daibutsu-den and then go up the path that turns up to the right just past the small pond to reach Nigatsu-do Hall.
- Check out Nigatsu-do and then walk in the direction of the base of Wakakusa-yama.
- Follow the narrow pathways through the forest to Kasuga-Taisha Shrine.
- Follow the main path from Kasuga-Taisha all the way west until you reach Kofuku-ji Temple.
- Cut through the precincts of Kofuku-ji Temple to get back to Kintetsu Nara Station or JR Nara Station.
- Note that if you’re really, really pressed for time, you can cut out the visit to Kasuga-Taisha Shrine. In this case, after visiting Nigatsu-do Hall, simply return the way you came to Kintetsu Nara Station.
Kofuku-ji Temple:


-
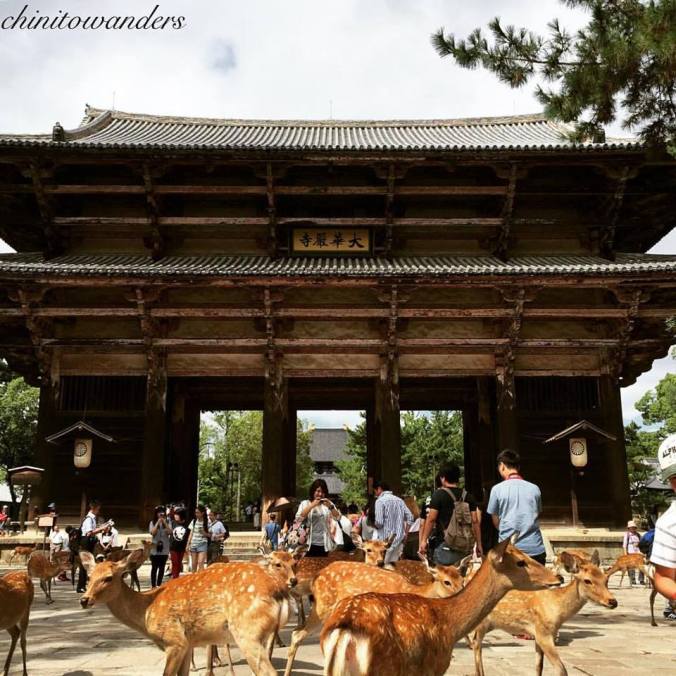
- Nandaimon Gate
-
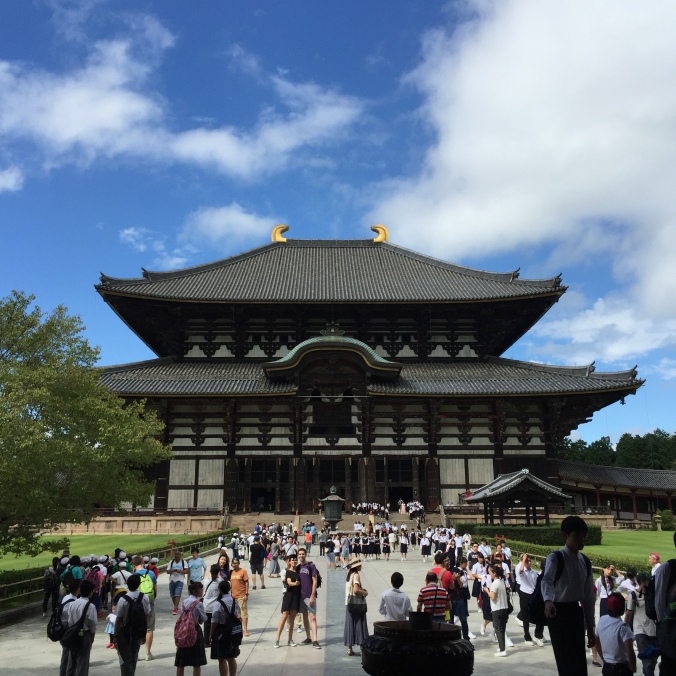
- Todai-ji Temple
-
- Daibutsu Hall
You may have lunch in between your walk. I recommend you eat at Kamameshi Shizuka. The location is just adjacent to Nara Park, you will know its the one as people queue outside the restaurant. To know more about the restaurant just refer to their website.
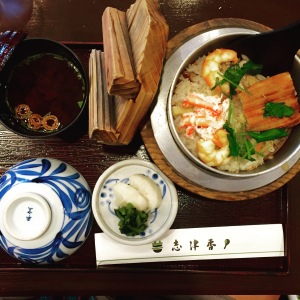
My Kamameshi Nara Special
After visiting Nara, proceed to Gion neighborhood & Yasaka Hall Gion Corner. Now time to hunt for some geisha.!!.😁
- Address: Yasaka Hall Gion Corner
Yasaka Hall, 570-2 Gionmachi Minamigawa, Higashiyama ward, Kyoto city, Kyoto Prefecture 605-0074 - Access: 1-minute walk after getting off at Keihan Gion Shijo Station.
Upon arrival in Gion Shijo Station, there will be Tourist Information center. You may ask some details where you might spot an actual geisha and visit other sites or where you can have the best Okonomiyaki in Kyoto or where the best place to have some dinner. The attendant is very knowledgeable so take it from her.


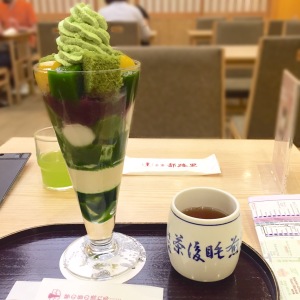
What to eat in Gion?
-Gion Tsujiri –matcha dessert shop in Gion. Eat Tokusen Tsujiri parfait / ¥1,383
– Issen-Yoshoku Okonomiyaki


A ¥680 okonomiyaki may seem pricey at first – but the generous amount of ingredients in this savoury pancake fully justified its price and should be on your must-eat list! Exploding with ingredients, the okonomiyaki resembles a huge overflowing pancake.
Cost: ¥680
Opening hours: 11:00am – 3:00am (except sundays close at 10pm)
Address: 238 Giommachi Kitagawa, Higashiyama-ku, Kyoto 605-0073, Kyoto Prefecture 〒605-0073東山区祇園町北側238番地
Nearest station: Gion-Shijo station (祇園四条駅)
*back to hostel
Sept.9: Nishiki Market , travel to Osaka, Dotonburi & Shinsaibashi
This time I woke up at 8:30am. A bit late since I needed a bit of rest from a fully packed itinerary and since my plan was just to stroll along Nishiki Market and have a good time eating freshly made/cooked foods.😋😋😋😋😋
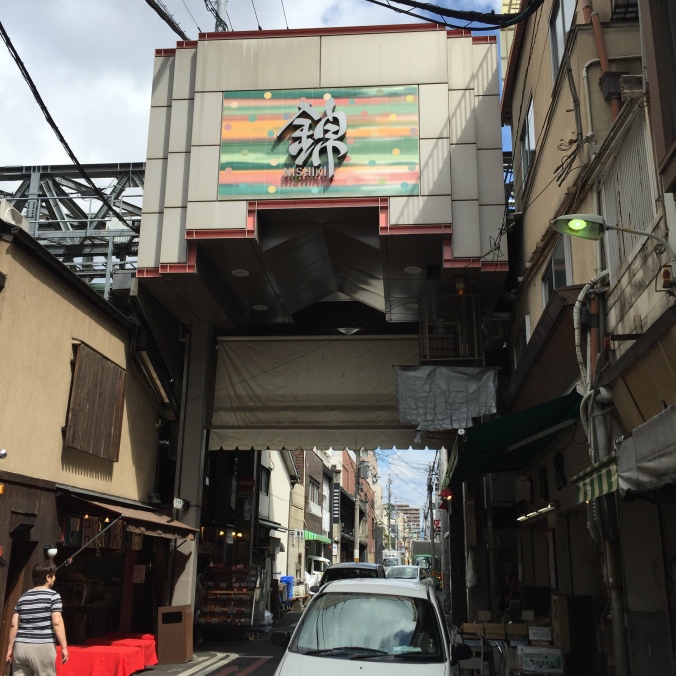
I checked out and left my luggage in their storage room before I went to Nishiki Market. I walk my way to Shijo Station which was about a five-minute walk from the hostel then hopped on a train to Gion-shijo station (the nearest station to Nishiki Market).
Alighted at Gion-Shijo Station then walked my way to the market after which I started my quest for good food.
Refer to my blog for foods that you should try while in Japan:
Chinitoeats: Food Trip – 17 FOODS that you should not miss when in Kansai Region, Japan
After I had a very good gastronomic activity, I went back to my hostel to freshen up a bit, got my luggage and went on my way to Osaka.
Afternoon:
GOING TO OSAKA.
I booked one night stay in Osaka at Khaosan World Namba Hostel. I have read good feedback about this hostel and surprisingly near to subways and even JR Bus Station going to the Airport. So I think its an added bonus for its location. Though this hostel is pricier than the average hostel in Osaka, but it has its reasons as to why. You can read some feedback in Agoda.com
HOW TO GET TO Khaosan World Namba Hostel from Kyoto:
Use Google Map. Google Map will show you the fastest route going to your hostel from Kyoto, just carefully follow it.
Upon arriving at the hostel, I checked in and then asked the receptionist for some advice on places to go. You may ask for a Osaka map from them for free. I went up to my room, rested for a bit before I went on strolling around Dotonburi/ Shinsaibashi.
After I rested, I started my walk to Dotonburi. Dotonburi area might be the center kitchen of Japan. The area has tons of restaurants, food stalls and everything about Japanese food is there. Go in an all out food spree! 😆😁😋😋😋


Along the neighborhood are Shinsaibashi and Umeda wherein in there are tons of boutiques to shop in. If you want to buy some souvenirs, go to Tenjinbashi.
What to eat:
Creo-Ru Takoyaki, Japanese Dango, Taiyaki, Tako Tamago in karamon market, Kura Sushi etc. or refer to the links below:
Chinitoeats: Food Trip – 17 FOODS that you should not miss when in Kansai Region, Japan
Chinitoeats: Fugu – eating the world’s most poisonous fish
Chinitoeats: Piere Lotti- an Ice Cream that actually stretches!!
What I ate when I was there:
2 kinds of Takoyaki, a korean inspired ramen, Fugu, Piere Lotti Ice Cream and lots of ready to eat foods in convenience stores.
I went back to my hostel almost midnight just when my feet was like falling apart from all the walking, but it was fun! Really fun!
Sept.10. check out, Osaka Castle, Shinsaibashi, Dotonburi, back to hostel & depart to Airport
I woke up at around 8AM and had breakfast inside the hostel. I just bought food from Family Mart the night before and placed it in the fridge and have it heated up by the morning.
I had an early check out and left my luggage at the hostel while made a last minute strolling in Osaka. I visited Osaka Castle. Again, just use your google map for the fastest route for you to get there.


After I was done wandering around Osaka Castle, I went back to Dotonburi area for some last minute souvenir shopping and food trip.
I went back to hostel before 2pm and collected my luggage then headed to OCAT JR Namba Bus Station for a limo bus to the airport. It is located just one block away from the hostel. It’s very near. You may ask the receptionist for the detailed instructions to locate the building but it’s very close. The bus station is on the 2nd floor of the JR Building.
After getting on the 2nd floor of the JR Station Building, you will be able to see a ticketing area where you can buy your bus ticket going to the airport.
In a flash, I was already going back to the Philippines. It was a pretty short five-day trip with actually just four whole days to explore Kansai Region but it was definitely a one of a kind experience. Yes,in my experience it may be a bit more expensive to travel in Japan that any other Asian country I’ve been to but you would be amazed not just because of the scenic spots or the food but you can also appreciate how rich there culture is, how they value and preserve it. I made lots of great memories and tons of checked items off the bucket list. Hehehe. I hope I will be able to go back to Japan again, and this time, it will be Tokyo and also to see the famous Mt. Fuji.

Hi! My sister and I are planning on visiting the Kansai region for 6 days and I have a similar itinerary to yours, except we won’t be going to Nara because we plan on spending a full day at US Osaka.
What transportation cards did you purchase for the entire trip? I understand that the ICOCA and Haruka are for Kyoto, plus the unlimited bus ride one. For going around Osaka, what card did you use? Is one of the cards you purchased for Kyoto also used for their subway? And do any of these cards also cover the ride from Osaka to Kansai International Airport on the way home?
I really hope you can help me with this because in planning this trip, our routes/modes of transportation are the ones confusing/stressing me out.
Thanks in advance!
LikeLike
Hi Kristine! Tha ks for reaching out. Anyway youre only going to need the ICOCA pass for all the transportation. ICOCA pass can be used all throughout Kansai Region, that includes Osaka. ICOCA Pass can be used back to the airport but it will take a couple of stops before reaching the airport. What I can sdvose to you is either get a Haruka Return ticket from Osaka to airport or ride a bus which can be found in Namba area. Bus is cheaper by the way!
Yes,transpo mode in Japan is quite complicated but once you get the hang of it,it will be easier and convenient.
Enjoy Japan, i can’t wait to get back there though.😊
LikeLike