Liao Fan: Hong Kong Soya Sauce Chicken -An In depth Experience

img_1567

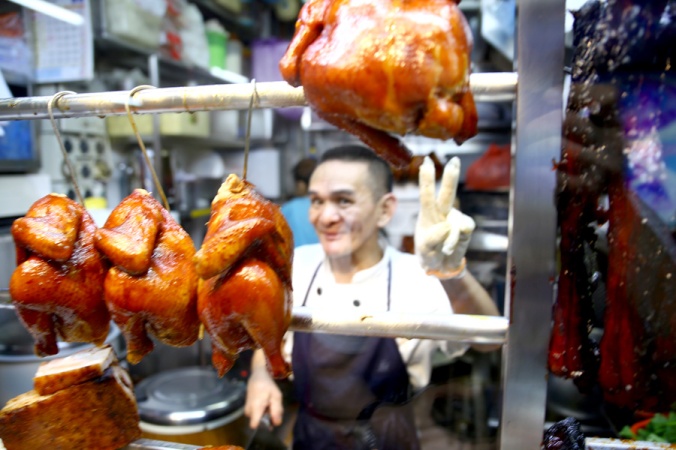
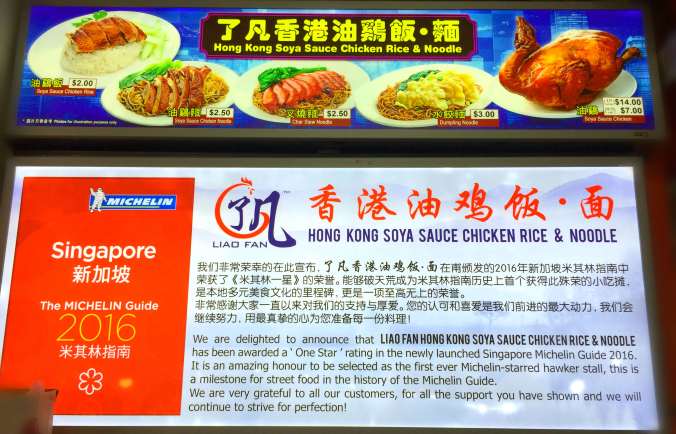
The 1st ever Michelin-starred Hawker stall, this is a milestone for street food in the history of the Michelin Guide.

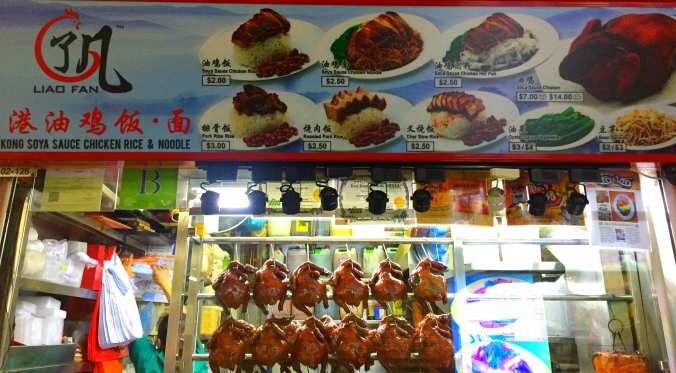
Chan Hon Meng, the man behind this small stall is on cloud nine. His Liao Fan Hong Kong Soya Sauce Chicken Rice and Noodle which is an Hawker stall has been awarded a “One Star” rating in the newly launched Singapore Michelin Guide 2016. Due to its recognition, foodie around the world have been raving to try this hawker stall, the cheapest Michelin starred worldwide.

img_1586

liaofan1

Chef Chan Hon Meng (photo credit to the owner)

My Experience:

I am one of those foodie out there that’s been raving to try it! I added it in my Food Bucket list as soon as I’ve read about it in my Facebook news feed.  As a resident from the Philippines, I couldn’t try it right away unless I booked an air ticket from the Philippines going to Singapore. I patiently waited until such time, me and my friends decided to have a South East Asia Trip and included Singapore as one of the country to visit. I immediately decided to include this in our itinerary.

img_1566

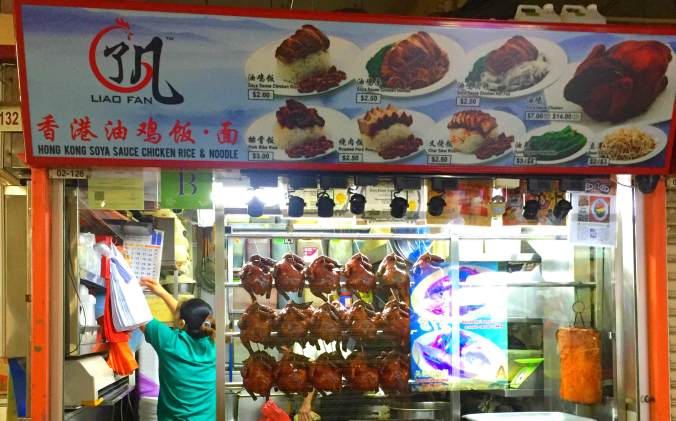
Welcome to Liao Fan’s Famous Soya Sauce Chicken. 😋

I have a friend who is working in Singapore as a nurse. She already gave me a heads up that the queue would be very long since they tried going there but end up eating at another hawker stall because the queue was just too long.

Determined that I should try it, I decided that we will be there very early. Liao Fan opens at exactly 8:30 in the morning. We woke up around 5:30am to prepare and was at the hawker stall area by 7:30am. Though we were an hour early, there was already around 8 customers that were waiting in line. Still, it made us happy knowing that we will be one of those few customers to get a chance to eat it without lining too far.

img_1565

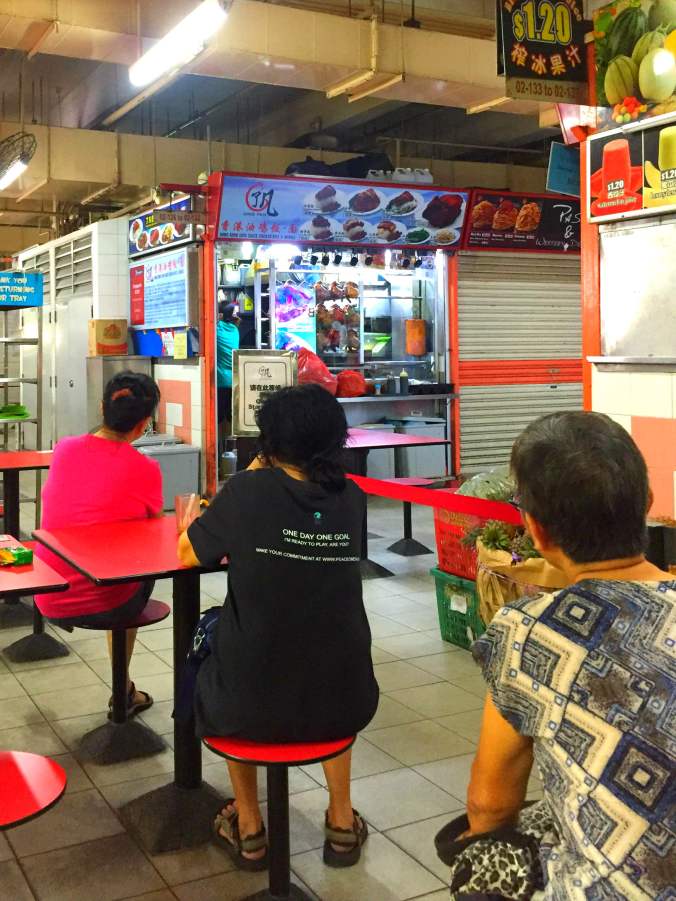
In queue, while waiting for Liao Fan to open.

While we were waiting, we munched on a local Singaporean Bread that was sold near the stall area, drank some local Teh Tarik ( hot milk tea beverage which can be commonly found in restaurants, outdoor stalls and kopi tiams within the Southeast Asian countries of Malaysia and Singapore.) and chatted our way while waiting for Liao Fan to open.

img_1570

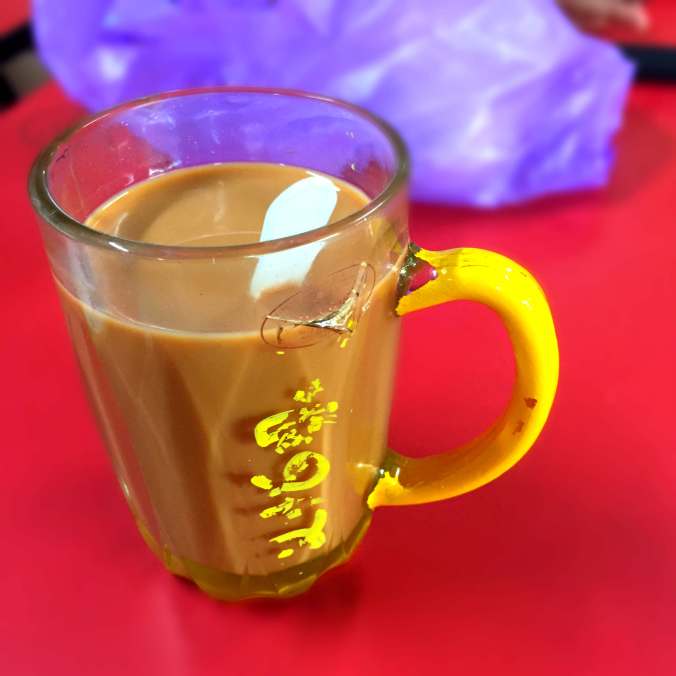
my local Teh Tarik. Cost 1.20 SGD. Don’t mind the broken glass.😆

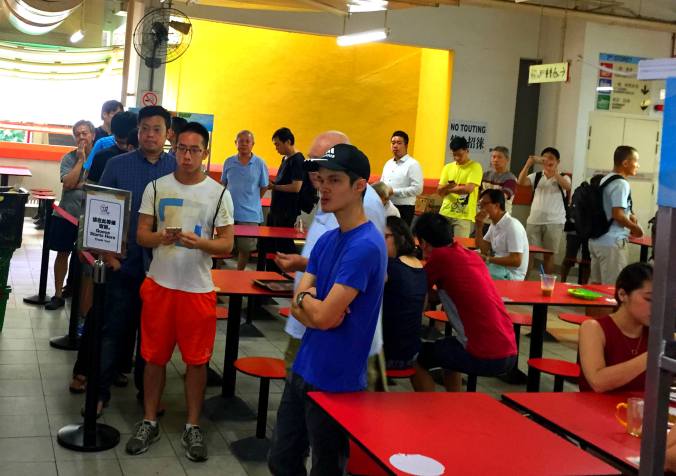
Once they opened, an usher will immediately guide each customer for there turn to order.

img_1585

the usher in blue shirt.

After a couple of minutes, it was our time to order. We were overjoyed by the prices of there menu considering it garnered a Michelin Star. How cheap?  Well, let me tell you that one order only cost 2.50 SGD. That’s only about 90php! What a steal! We this pricing, we ordered three Soya Chicken with Rice plus a Pork Rib Rice and Soya Chicken with noodles as Extra. With generous servings  Para lang kaming nag buffet. LOL And we were only 3 eating it! .😋😂

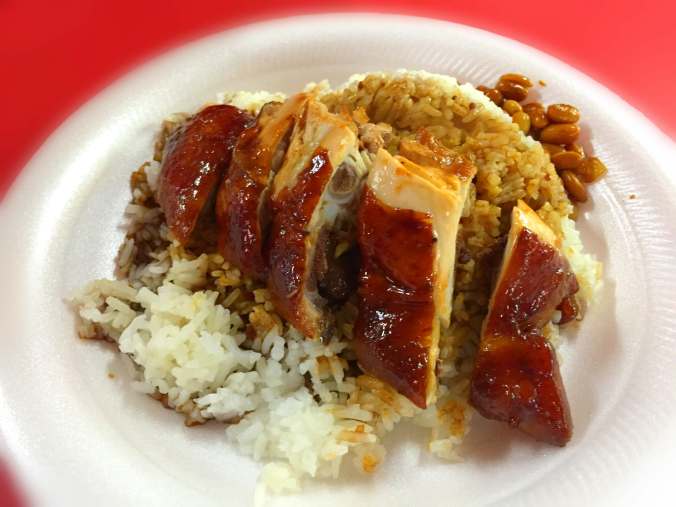
img_1571

Soya Sauce Chicken in Rice😋

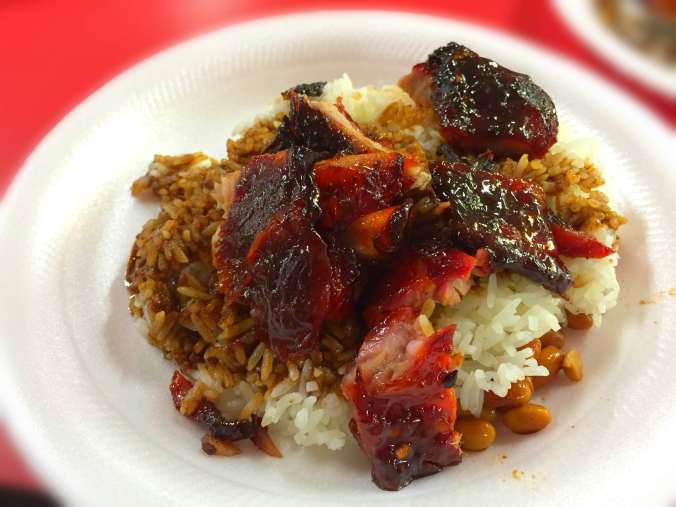
img_1572

Our Pork Ribs in Rice. Meat is very tender! =)

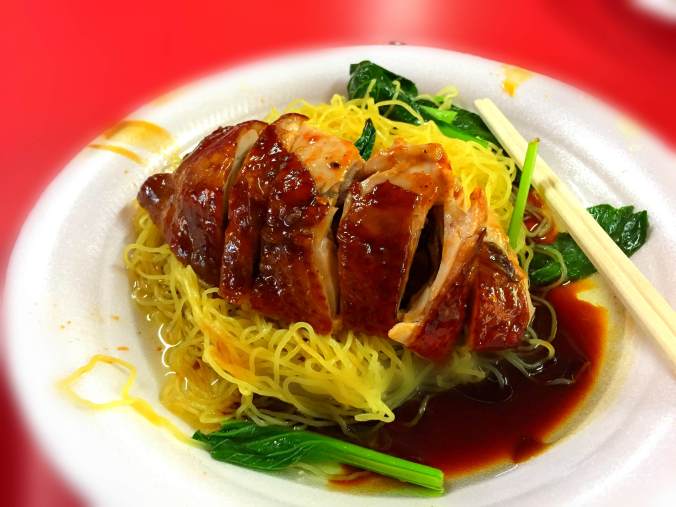
img_1573

Soya Sauce Chicken in noodles.😋

Personally, I have tasted few Soya Sauce Chicken rice both in the Philippines and even in Hong Kong, but honestly this is by far the best. No wonder this hawker stall got such recognition.😊

Describing it through words wont do much justice. So experience it for yourself.

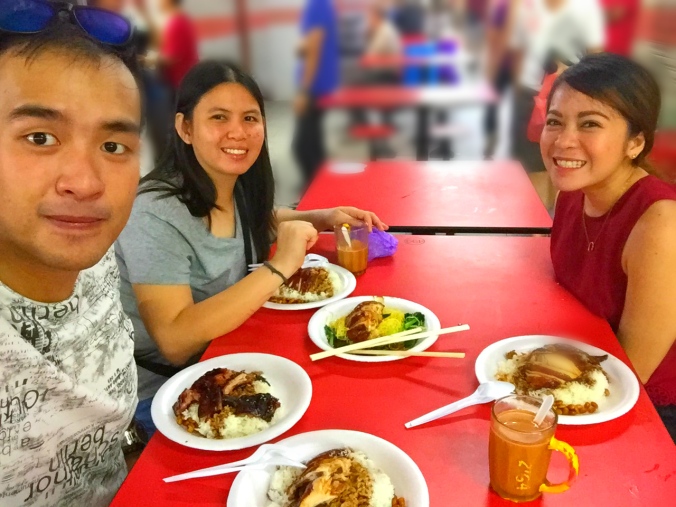
img_1579

Finally, its chow time!😋😋

If ever I’ll have the chance to be back in Singapore, I will definitely eat there again! Another bucket list to all the foodie out there.

Address:

Hong Kong Soya Sauce Chicken Rice and Noodle 香港油雞飯麵
Blk 335, Smith Street #02-126, Chinatown Food Complex, Singapore 050335
Opening Hours: 10:30am to 7:00pm (Mon – Tues, Thurs – Fri), 8:30am to 7:00pm (Sat – Sun), Closed Wed

Thip Samai: a taste of the World’s Best Pad Thai | Chinitoeats

Known as the National Dish of Thailand. Undoubtedly the most acknowledged Thai dish worldwide.

Before I would impart to you my experience of this world renowned dish, it is best to give you a little bit of its history.

How Pad Thai was invented:

Pad Thai has been first introduced in the era of the Thai Prime Minister, Field Marshal Plaek Phibunsongkhram in the middle of World War II. During the crisis of World War II, the prime minister tried to create a campaign that drove Thai people to consume there local natural produce, thus Pad Thai was introduced and became the signature dish of Thai foods since then.

Through the ages, Pad Thai are becoming more of a staple food in Thailand that most if not all Thai Restaurants and even street vendors are offering this dish.

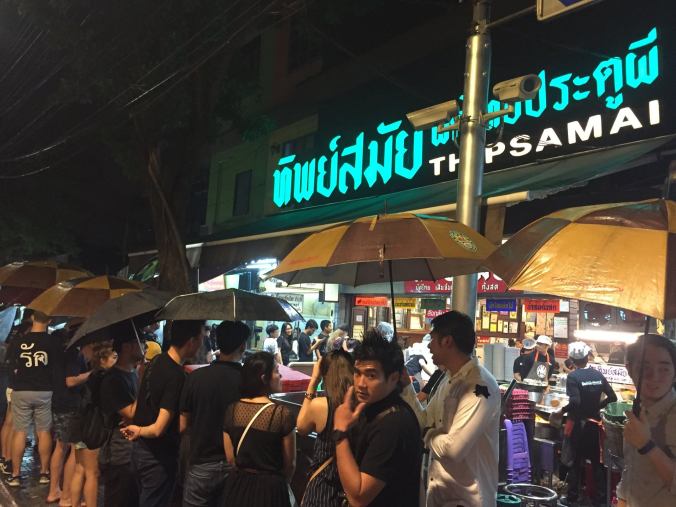
There may be a lot of Pad Thai that are available in Thailand, but one restaurant really stand out. This is Thip Samai  or better known as ” Pad Thai Pra-Too-Pee” to Thais, because the restaurant is location along the intersection of Pra-Too-Pee in central Bangkok.

Getting to know Thip Samai:

When Pad Thai was introduced there were few restaurants that caters this food, however, with the neat and delicate cooking method, PadThai Pra-Too-Pee became famous that the Prime Minister itself, who created the name Pad Thai, acknowledges there Pad Thai as the “True Authentic Pad Thai in Thailand”. Occasionally the Prime Minister would invite foreign visitors to dine in at the restaurant to taste there Pad Thai.

Later on, the name Pad Thai Pra-Too-Pee has been changed to “Thip Samai” Restaurant in 1966. With the long history of more than a half a century, they have been standing and walking together with Thai people in every crucial and critical event. The restaurant became famous because they are always meticulous in selecting there ingredients.

My experience:

Arriving late in Bangkok did not stop us from visiting the place on our first night even though we had a back breaking 10 hour ride from Cambodia.

Having a taste on this famous Pad Thai was first in my list. Eager to go there, I asked the owner of our hostel on how we could reach the place.

The restaurant was bluntly a 20 minute walk from our hostel. Aside from we were dead tired, it was raining. But our strong will got us there.

We were greeted by a long queue that was evident outside the restaurant. The good thing though is that there service and cooking time are quick and most customers just sit, dine and leave to give room to others who would want to taste this famous dish.

14856165_10154702359929168_7535423024765621165_o

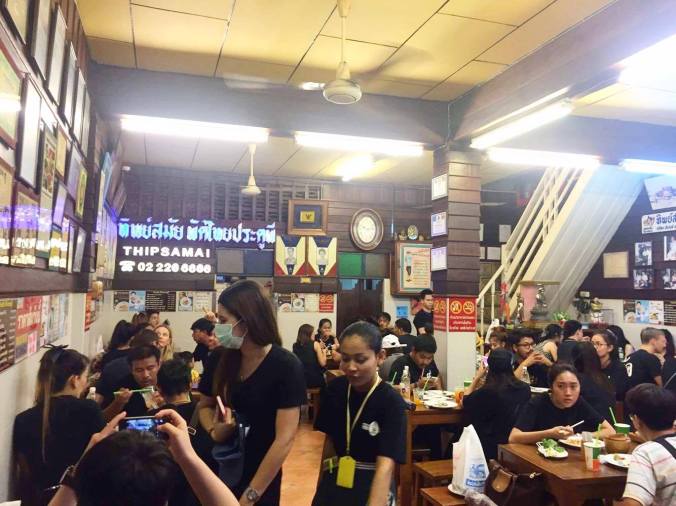
We waited in line for about 30 minutes before we were given a table. You will really noticed that the place is old but somewhat well maintained. Hanged on the walls are there recognitions and awards in various organizations that made them well-known.

14958911_10154702382864168_806200944_o

We were then given a English Translated menu.

The thing with there menu is that they do not have many dish to choose from (maybe one more reason why there serving time was quick). Inside the menu was the recommended menu “The Superb Pad Thai”. It is a Thai style vermicelli stir fried in shrimp oil with some beansprouts, tofu, chives and deep sea prawns then delicately wrapped with fried egg which was the one we ordered.

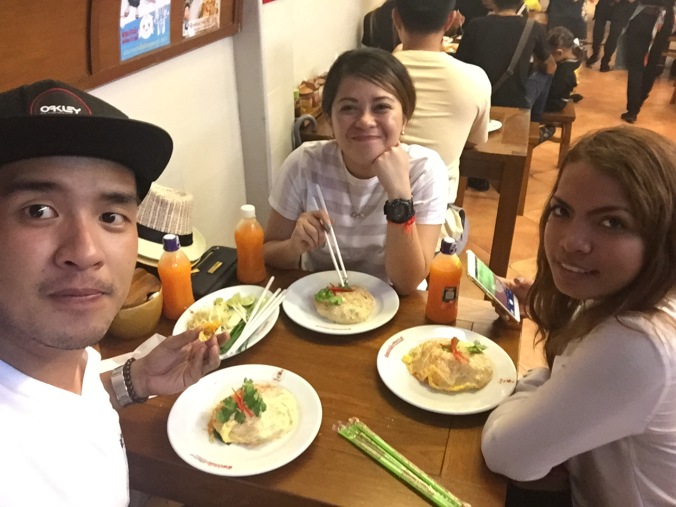
Here’s how it looked. Exquisitely cooked.

The taste was heavenly. We were in Bangkok for 4 days and had Pad Thai every single day in different restaurants and food stalls, but this is indeed by far the best. The noodles itself had a taste, not like the other noodles that we tasted that are quite bland.

Selfie with our food:

img_2156

I also observed when we arrived is that they use coal fire to fry the Pad Thai which I know brings more flavor than the usual method of cooking.They really do think about the quality of there food and even there way of cooking.

Aside from there famous Pad Thai, there are two drinks you have to try here. One of them is the icy Coconut Juice (30 baht) which is actually a recipe of King Rama 9’s mother. She gave the secret recipe to this shop, to pair it with their Pad Thai. The coconut juice is very very sweet and there is coconut meat in each drink.

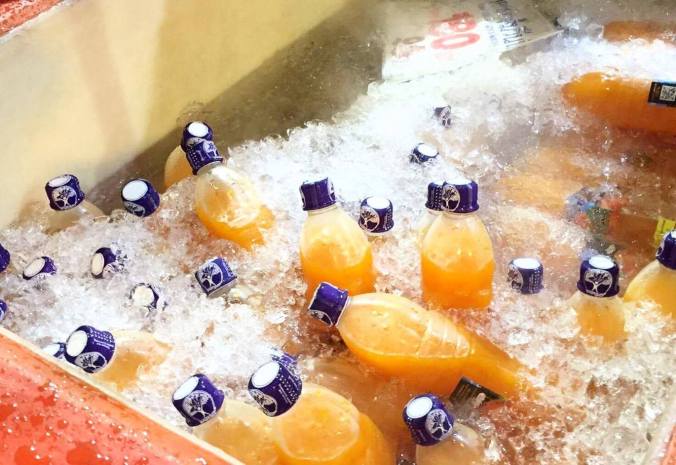
Another drink is the freshly squeezed orange juice which was very sweet and refreshing! No preservatives are added, just fresh oranges are used to make the juice. I had the small one(250ml) which costs 90 Baht and the large bottle (500 ml) costs 160 baht. Although they said that the orange juice may vary in price 2-3 times a depending on the oranges they used.

14958215_10154702382994168_1251202109_o

Verdict:

If you’re a foodie like me, it would be best not to miss this when you visit Bangkok, Thailand.

Pad Thai Thip Samai (Pad Thai Pratu Pi) ผัดไทยทิพย์สมัย (ผัดไทยประตูผี)

Address: 313 313 Thanon Mahachai, Phra Nakorn
Hours: 5 pm – 3 am daily
Phone: 022216280

ผัดไทยทิพย์สมัย (ผัดไทยประตูผี)
313 อาคาร บริเวณภูเขาทอง ถนนมหาไชย (มหาชัย) แขวงสำราญราษฎร์ เขตพระนคร กรุงเทพฯ 10200
เปิดทุกวัน เวลา 17.00-03.00 น. (หยุดทุกวันพุธต้นเดือนและปลายเดือน)

โทร. 022216280

How To Get There:

Pad Thai Thip Samai is located in the old district of Phra Nakorn, just a few minutes walk from the Giant Red Swing near Chinatown Bangkok, and very close to the Golden Mountain.

If you go as soon as they open, you can take the Khlong Saen Saep canal boat to the final Panfa Leelard station, exit towards Ratchadamnoen, make a left on Mahachai, and the restaurant will be on your left hand side. Alternatively, you can either take a taxi directly there or a bus. It’s also an easy 5 minute walk from Democracy Monument.

If you happen to buy the tourist sim card for data usage, you may use google Map to locate it.

Chinitoeats: Exotic Foods in Bangkok -Conquered! (A Foodie must Experience)

14963606_10154698491679168_323985816_o

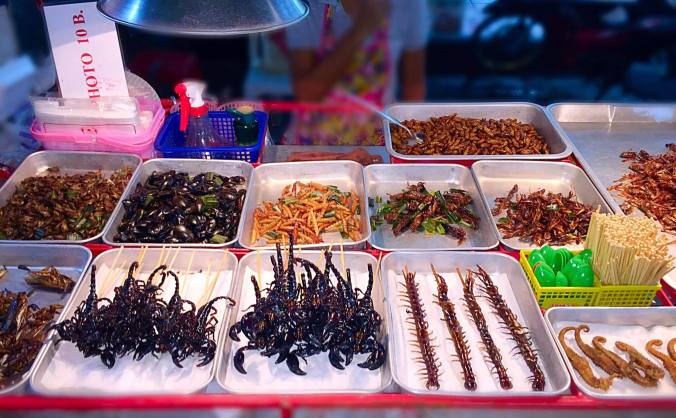
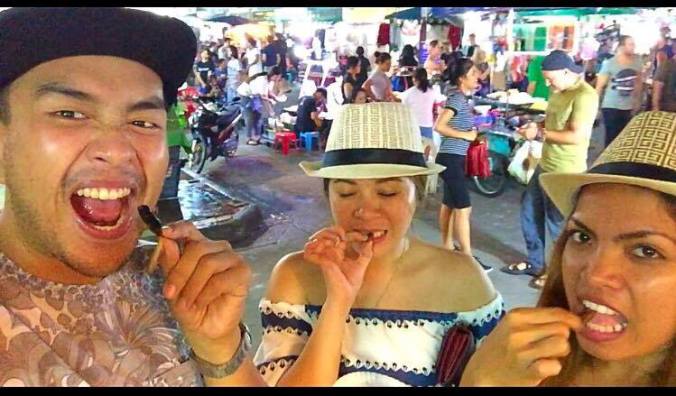
Scorpions, worms, cockroaches, crickets, locust- we tried it all.!

It was an all or nothing experience. When I decided to have my South East Asia tour in Bangkok. I immediately thought of trying there exotic foods, by exotic I mean the real hairy, black, ugly little creatures. Yep, the creepy crawlies everyone’s been talking about that are abundant in the streets of Bangkok at night.

I’ve been so excited to try these little crawlies that most people doesn’t have the stomach  to even dare taste it. Fast forward, the day came that we arrived in Bangkok. We arrived at around 8pm already from Cambodia. It was a back breaking 10 hour ride. I swear to never do it again. Anyway, I was not able to try these things right away. It was on our 2nd night in Bangkok that I had the time to stroll along Khao San road (the road known to backpackers worldwide) and hunt them out.

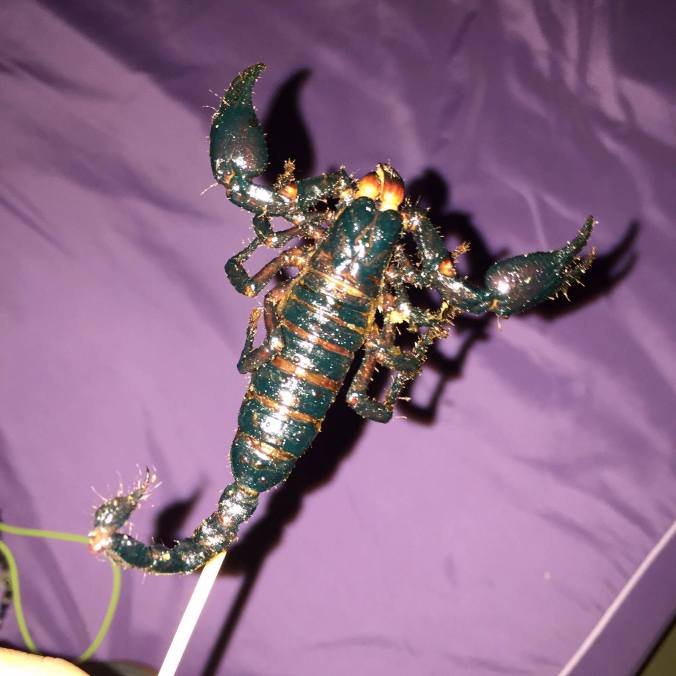
You can see them right at the heart of Khao San road around 9pm. They will be displayed in food carts.While you can see scorpion vendor selling at an earlier time  of the day but it is expensive. (be very careful if you are thinking to try one right away as they will try to sell it for 150 baht a piece. Rip off!! Normally, a regular sized scorpion will only cost 50 baht.)

14894578_10154698491824168_206103008_o

A closer look… Those hair though..Mmmmm 😋

We decided to try a little bit of everything, excluding the huge centipede and the Tarantula. We just thought, we don’t have the courage to try it as it was physically disgusting to look at! “argh! Luora!” (that’s disgusting) as what my friends utter.! Hahaha 😆

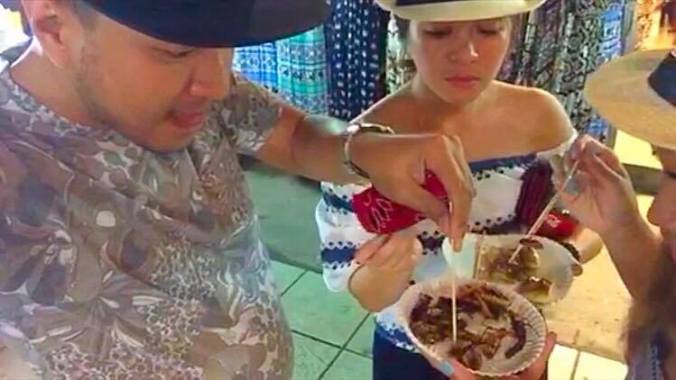
We had our plate of creepy crawlies for 100 Baht. We had few pieces of worms,  huge wood maggots, huge Grasshoppers,  Crickets and cockroaches! Are you ready dig in? Excited? more like anxious actually. Hahahaha. 😂😆

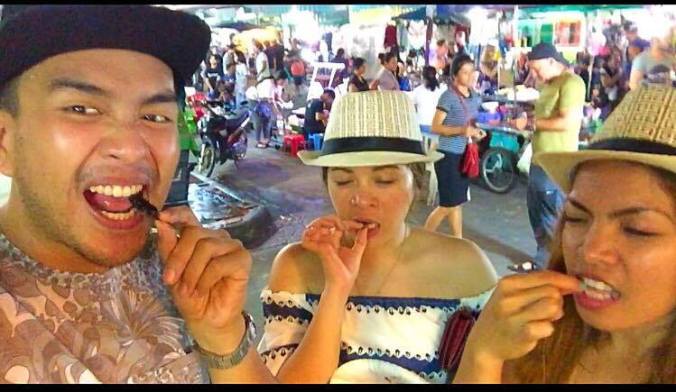
Our curiosity peaked when we started sticking one insect in our stick and started munching it.

14886248_10154698491584168_532398868_n

14914825_10154698491564168_511649053_n

14961432_10154698491544168_605910365_n

here goes! Hahah

14937832_10154698491579168_488854293_n

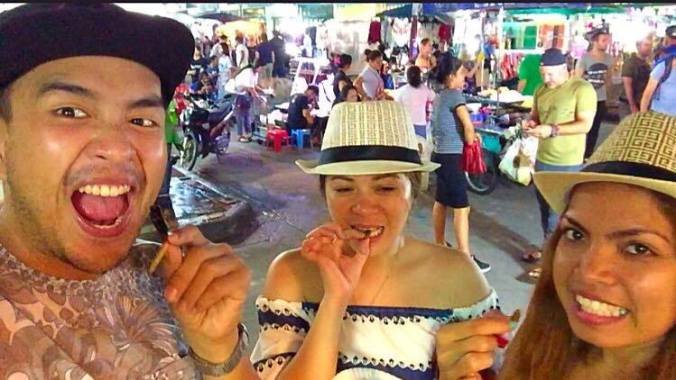
the faces are just priceless..😂😂

All of them pretty much tasted the same, just like a fried shrimp or crablets with skin on except for the maggot that tasted like cooked pig brain. Yuck! Hahaha  Call me crazy but I actually liked it. LOL😂😆😅😁

collage

It was indeed something to remember and bragged about when people will talk about it. If someone would ask us if we tried it, we would say “been there, done that.” Lakas ng loob lang? haha 😁

One time experience was enough to satisfy our curiosity about the taste of these creepy crawlies. Next time, I will try to have the centipede, maybe! 😉

To all Foodies out there, I challenge you to try one of these exotic foods at least once in your life. You might enjoy it! LOL Have fun grossing out! ahahahha 😁😁😁

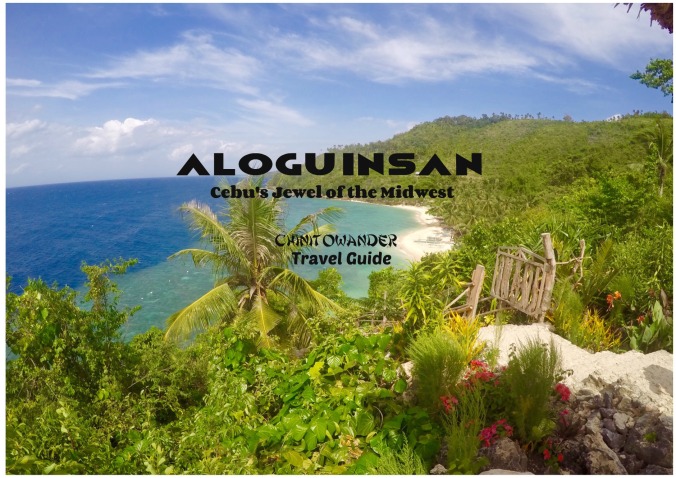
Chinitowanders: Cebu’s Jewel in the Midwest| Aloguinsan (Travel Guide)

img_5567

One of Cebu’s hidden gem that’s slowly becoming popular to tourist and local travelers who wants to have a flash getaway.

Aloguinsan is situated west of Cebu Province near Pinamungahan and is dubbed as the Eco-tourism capital of Cebu. We visited 4 tourist spots here in Aloguinsan. If you want to have a quick exploration, this place is definitely for you. You ca do this trip in 1 full day.

Getting there:

Since its a one day trip, we decided to start early. We went off to South Bus Terminal in Cebu City. There is only one trip going to Aloguinsan directly and departs at 3:30am and costs 120php. Just tell the driver to drop you off at Aloguinsan Public Market. Be sure to get that bus so that you want have to get off and get on another bus.

Alternative route if you miss the Aloguinsan bus:

  • Ride a bus at South Bus Terminal going to Pinamungajan. It would be better if you ask the bus driver where to drop off.
    > Bus Fare: Php 90 per person
  • Ride a jeepney from Pinamungajan to Aloguinsan.
    > Jeepney Fare: Php 40 per person
  • Ride a habal-habal (motorcycle) from Aloguinsan going to Barangay Kantabogon.
    > Habal-Habal Fare: Php 50 per person

Once you arrive in Aloguinsan (specifically in Public Market) you will be able to see a post from the Tourism Department about the motorcycle rates going to different tourist spots.

Note: Beware of some motorcycle drivers that will rip you off. We had that kind of experience that made me traumatized and decided never to go back unless I will be driving my way there. In order for you to prevent from getting scammed. Just go the the tourism office located at the 2nd floor of the Public Market.

We arrived at Aloguinsan Public Market around 6am and had our breakfast at a Carenderia located inside the market. After which we started our tour.

1st stop: Aloguinsan Baluarte. Entrance fee is 20php. The Baluarte, situated at the top of a hill, is a witness of Aloguinsanons historic past as it served as a warning system against Moros decades ago. After we had our quick exploration in the area and a few snaps, we decided to went to the beaches and start ourselves to get wet. We talked to some local motorcycle drivers to take us to our first beach, the Hidden Beach.


2nd stop: Hidden Beach. True to its name its a hidden oasis. However, this did not stop tourists and getaway-seekers to discover its beauty. This white sand beach is a must-visit unfortunately it was low tide when we got there so there isn’t not much to do,we didn’t even swim. But locals told us that we could have appreciated it if its high tide. It didn’t take too long till we took off.

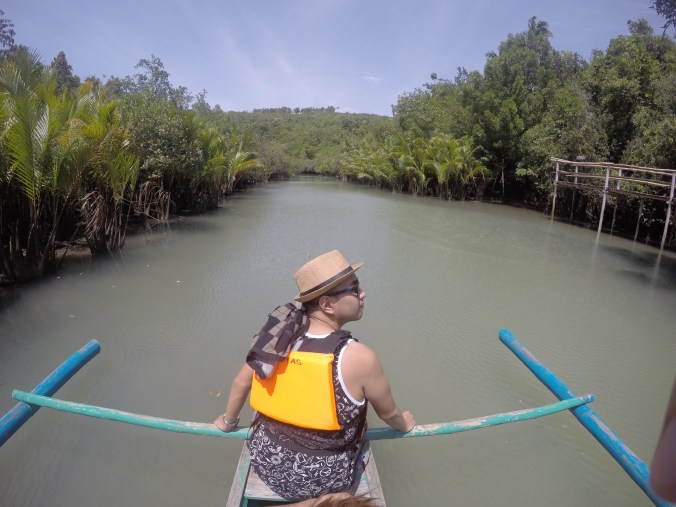
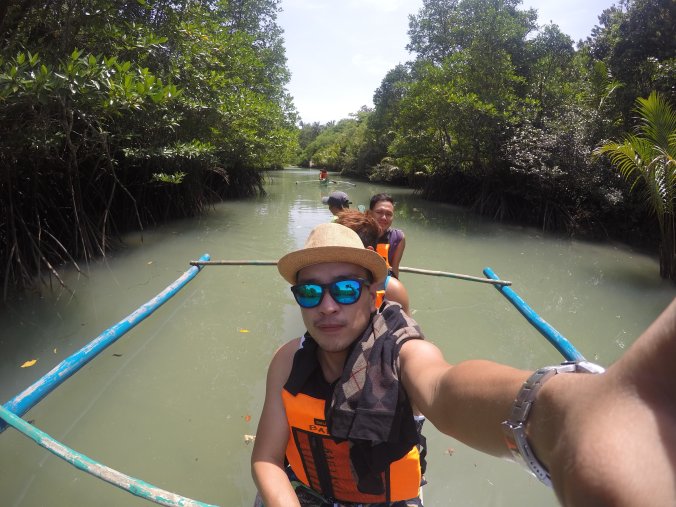
3rd stop: Bojo River. Now this tour is something unique though it would slash 400 pesos off your wallet for just this tour. Well,even though it was a bit steep, I’d say it was still worth it. Part of your payment goes to local out reach program as well as for the maintenance of the river. There are few local stories/legends about the river which makes it more exciting. Bojo River comprised of 22 specie of Mangroves which are protected by the local government. While our boatman paddled our way upto the open or the mouth of the river that will lead you to the open sea which you can swim on. I can’t help but compare its beauty to Mekong River. Lakas maka Mekong River ang view. It’s true that whatever you see abroad, there’s always a counterpart here in the Philippines. It was fairly windy at that time when we were there but it didn’t stop us from swimming. Afterall, we had our life jackets with us..LOL

DCIM100GOPROG0110173.

Lakas maka Mekong River ang view…hahaha

DCIM100GOPROG0090171.


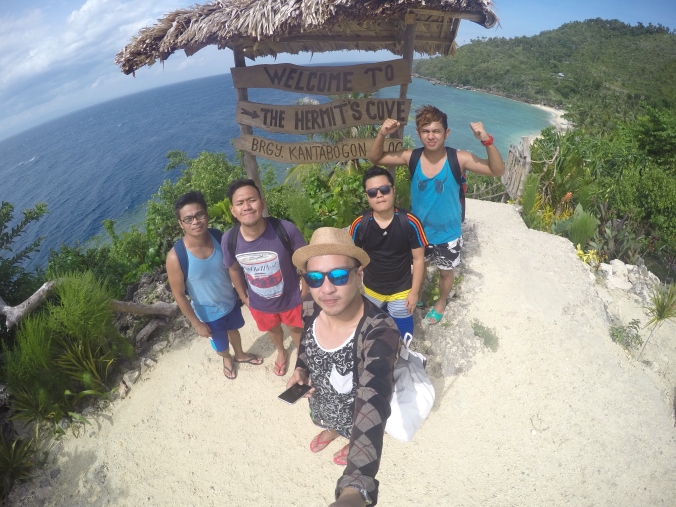
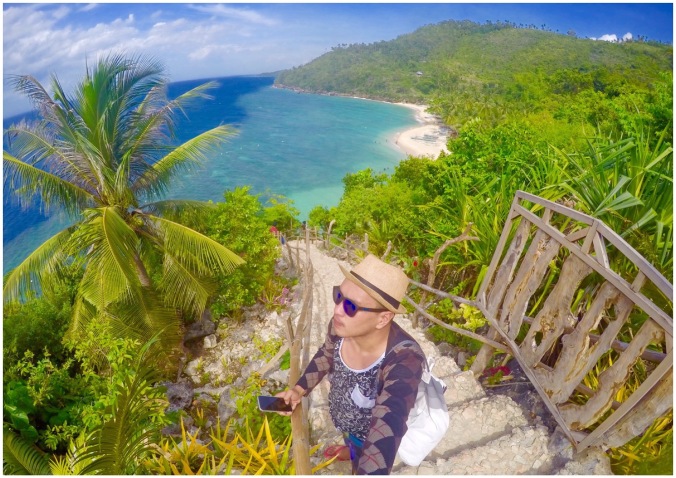
4th stop and last Stop: The Hermit’s Cove. Famous for its white sand beach. Though its actually not powdery white sand but its good enough (for my standards) to take a dip and have a good tan on your skin. The view at the top of the cove was awe inspiring.

DCIM100GOPROGOPR0431.

Welcome to Hermit’s Cove!

Entrance fee was 50php and free corkage to food except for the liquor. Also cottages are included in your entrance fee. So better to get there early so that you can have your own cottage. Luckily, there was a group of beach goers who just left and we are the ones who took there place.

hermets-cove-15

Tip: Buy your food for lunch in the Public Market since there are no food stalls in anywhere near by tourists spots. We just grabbed on some bread, fried chicken, hanging rice and some drinks for us to munch on.

After we had our heart’s content in swimming, we left the cove and got back to the Public Market and waited for a jeepney to take us to Toledo City were we got on a van in Toledo Terminal going back to Cebu City. Fare of the jeepney from Aloguinsan to Toledo City was 30php and 100php for the van going back to Cebu City.

Pros about this adventure: It was something new. Educational since you’ll know that there are about 22 species of Mangroves that’s living in the river. Few local birds and animals are also found in the area.

Cons: THE USUAL HAGGLING OF PRICES FOR YOUR MOTOR RIDE WHICH I REALLY HATE! What i observe is that they tend to almost rob you if you’re not good with your haggling skills. Despite that there local tourism implemented fixed rates for there ride,many are still tempted to rip you off. I HOPE THE LOCAL GOVERNMENT WILL DO SOMETHING ABOUT THESE PEOPLE.

Verdict: It was a nice experience (for the spots). But i would not go back nor recommend it unless there arechanges in there riders rate. It creates a deep trauma to tourist especially those who are backpackers that has limited budget for the trip.

Chinitowanders: A DIY Solo Daytrip- Trekking to the Crater of Mt. Pinatubo

11705129_10153467666524168_6062960567551280706_n

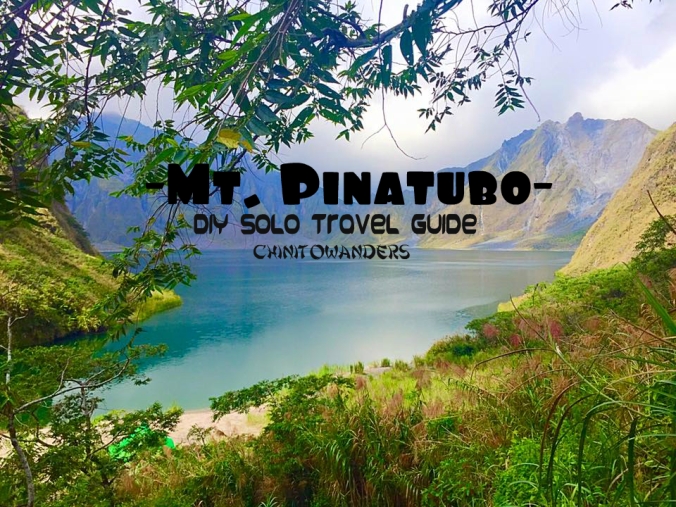
Mt. Pinatubo is situated in the section of Luzon called Cabusilan Mountain Range also known as the Zambales Mountains. It became a highlight right after its major eruption back in 1991. That eruption was labeled as the second largest terrestrial eruption of the 20th century next to Novarupta where its effects were devastating and felt worldwide. Now, although Mt. Pinatubo and areas surrounding it is still covered by lahar deposits, it has also become a tourist attraction of the country because of the jaw dropping landscape it has become. Adventure seekers, nature lovers and landscape photographers will surely enjoy exploring the site most especially its crater part.

How to get there? 

There are many  airline companies that goes to Manila. Manila will be your entry point in Luzon (Philippines) if you want to visit Mt. Pinatubo.

Trekking to Mt. Pinatubo can be done in a day. Since I opted just to have a day trip, I needed to wake up early to get the 1st Trip Bus schedule departure from Manila to Capas. I woke up at 1:30am and rode a taxi to the bus terminal of Victory Liner in Pasay but you can take any bus that will pass by Capas Junction. Buses from Manila (Pasay) going to Baguio, Dagupan, Pangasinan and Tarlac are some of the bus route that will take you there. I hopped on in a non-air conditioned bus that left the terminal around 2:30am. I paid 180 pesos back then. It was a 3-hour bus ride.I took the bus going to Baguio and just told the bus conductor to drop me at Capas (near the Capas Municipal Hall and Jollibee). As you alight at Capas, you will be then greeted with Tricycle drivers that will offer you a ride to Santa Juliana tourism office for 300php (its a fixed rate to all tricycle) one way, regardless of how many you are, maximum of 3 person per one tricycle. Mind you that from Capas, it will take you almost an hour to get to Santa Juliana.

Satellite Municipal Tourism Office
Tourists who wanted to see Mt. Pinatubo must register first at the tourism office and settle the fees below. By the way, these are mandatory fees and you’ll not be able to pass through the security of Mt Pinatubo without the approval of this office.

Note: The office is open as early as 6am and closes by 10am. Meaning to say, visitors must settle a ride going to Mt Pinatubo before the office closes. Visitors who’ll not be able to book a ride before that time will have to try their luck the next day. 😣😣

FOR SOLO TRAVELERS/JOINERS:

You may want to call the tourism office in advance for reservation in order for you to get a slot. Also, solo travelers/joiners are welcomed for this tour. Just call the tourism office ahead of time so that they can assign a coordinator/organizer that will include you with other solo travelers in a travel package form just like what happened in my case.

After the tourism office gave me the contact number to the coordinator (which I accidentally deleted. Sorry about that), I contacted the number and agreed with my package price as well as the meeting place where I would tell me Tricycle to drop me off.

I paid 1,900 to the Organizer with the following inclusion:

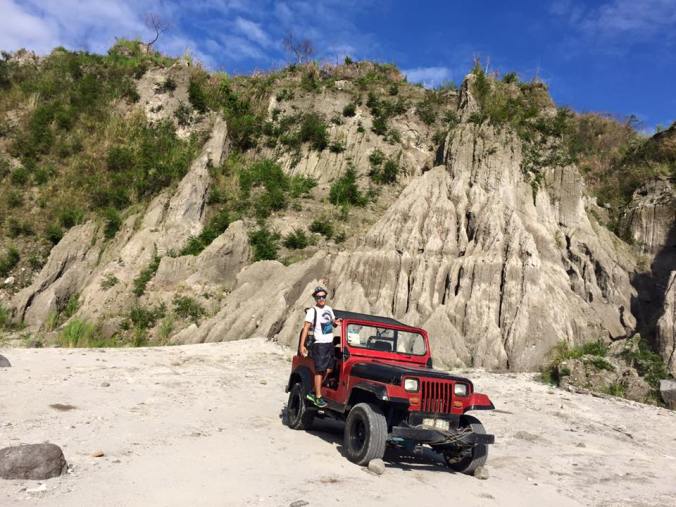
  • 4×4 Jeepney ride going to the campsite for your trekking start off point
  • 1 liter of bottled water
  • a local guide
  • set lunch
  • Registration fee

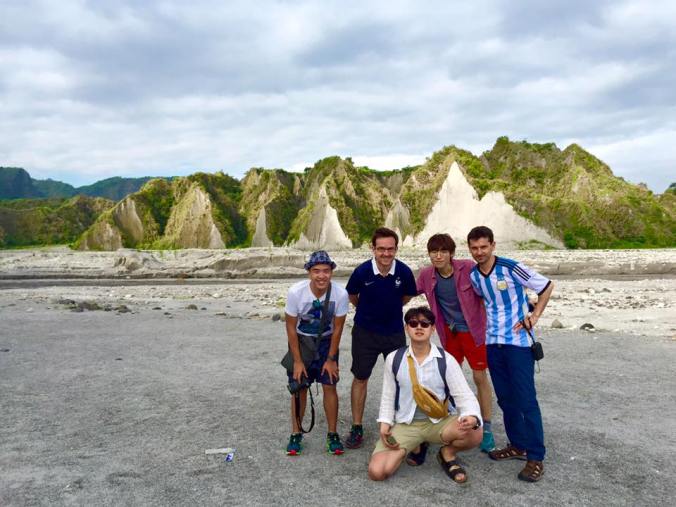
Not bad if you asked me. It was supposed to be 2,250 but there were 2 last minute koreans that joined us making us a total of 5 participants: 2 french nationals, 2 koreans, and me (a chinoy).hahah😁😁

11002587_10153467666889168_9119268321717819920_n

my Team. =)

I was thankful that I really call ahead of time to prevent from paying the 4×4 Jeepney ride all by myself. Aw

Contact:
SATELLITE MUNICIPAL TOURISM OFFICE
Ms Mai – 0947-3912134
capastourism.com

If you opted to go with your friends, these are the prices that you needed to pay when trekking to Mt.Pinatubo:
4×4 Jeepney Ride – 3,000 pesos (good for 5 pax)
Local Guide Fee – 500 pesos
Registration/Conservation fee – 450 pesos/pax

I arrived at Santa Juliana around 5am and waited in a resort that the organizer owned until 6am to get registered at the tourism office.

After the registration, I hopped on to the 4×4 jeep and started the ride. TIP: be sure to be seated beside the driver to have a good view and to avoid the scorching heat of the sun, as the back area of the jeep doesn’t have a roof. Approximately, it was a 1 1/2 hour jeepney ride packed with breathtaking views. I never thought that the destruction of 1991 eruption created a spectacular landscape. You can instruct the driver to stop anywhere along the road if you intend to take photos of the views as well as the locals and aetas that lives there. The aetas who lives there are really friendly, you’ll see them smiling and waving their hands as you passed by them. Smile back.😊

11141217_10153467666654168_6188044419609130499_n

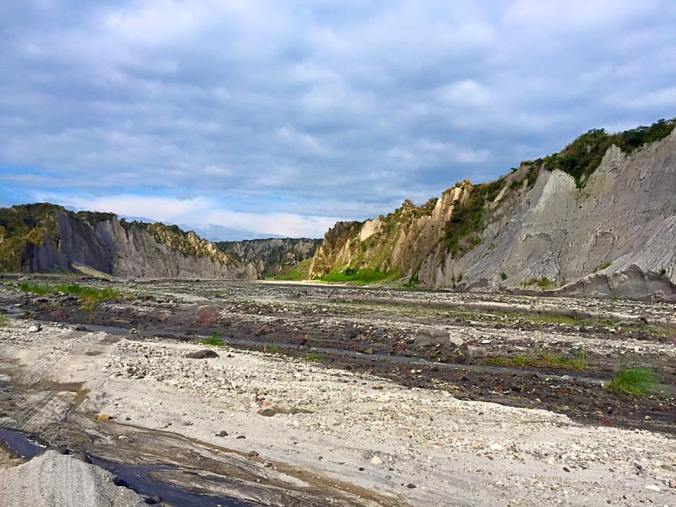
Your view from you jeep. all of which are lahar.


After a very bumpy-fun ride, the driver drop us at a point where he said that was as far as the jeep can go due to the storm that happened recently that changed the geography of the land that made us trek a gruesome 2 and a half shadeless trek to the crater instead of the 30 minute normal trek. As a first time/novice trekker like me, it was very tiring. I always thought of when the trekking would end. Hahaha😁😁. My fault for not doing warm ups.

11709507_10153467666814168_8455262781384723657_n

Lahar as my backdrop..

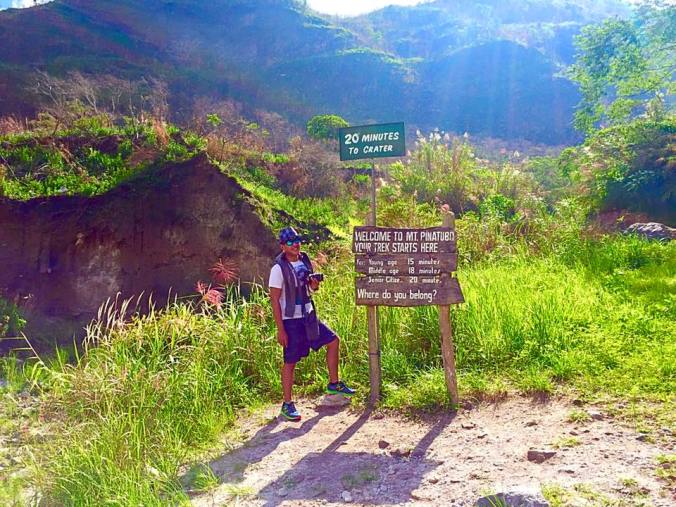
After a few hours of trekking, I saw a sign that says, it will be just a 1km trek to reach the top. More or less it will be just a 20 minutes trek depending on your pace.

11707661_10153467667199168_6712266441043993574_n

I saw the sign and I open up my eyes, I saw the sign! Almost there! =p

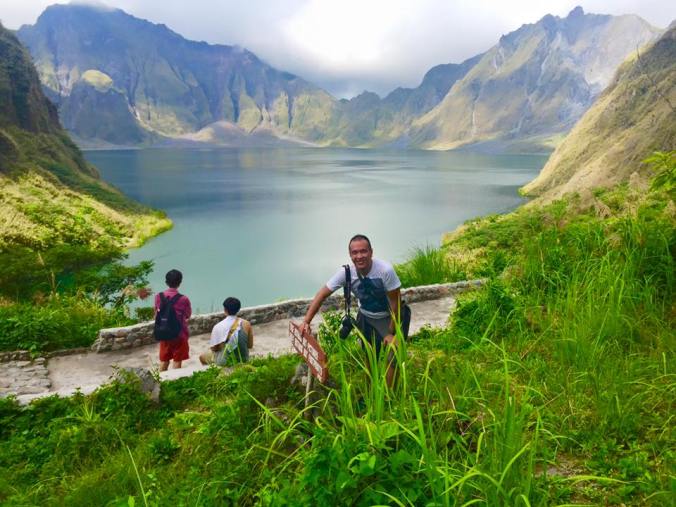
As I’ve reached the top, it was all paid off. The fresh air, the crater, the view… it was a site to behold. That being said, a lot photo op happened. Hahah😁😄 though I don’t think photos will do justice to such magnificent view.

11703286_10153467666459168_7949571451023268535_n11709687_10153467666749168_3596491433193259415_n

Note: There are comfort rooms in the area.

Tip: Since you’re a solo traveler, pack light. Do not bring unnecessary thing as this will add a toll to your trek. Also bring some snacks. Yes, there are stalls on your way up however they sold it like 3-4 times of its original price.

After a few minutes of mesmerizing, we trek again going down and ended the trip back to the resort and had our lunch. Although it was one of the most tiring trip that I had, it was also one of the most memorable treks I had to date. Should I go there again? Nah, once was enough. Hahahah.😂😄

Chinitowanders: 24 Hour Backpacking in Iloilo City and Southern Iloilo (Travel Guide)

img_4808

Tried to do a 24 hour tour around Iloilo City and south of Iloilo and pretty much succeeded going to the places I wanted to visit.

I may call this trip a Visita Iglesia tour since most of the places we went to were ancient Churches.

Aside from the tour, is the food trip! My trip wont be complete without trying out ones local Specialty. So I did a little pigging out! Hahaha.😂 Enjoy! I hope this short travel will be of help to those adventurers out there with limited time to explore Iloilo.

Thanks to my best friend who suddenly invited me to go with her to Iloilo City for a quick getaway.

It was a night before the said trip that she invited me to go with her knowing that I was not able to visit there ever since.She will only be working in the morning having the rest of the day free to explore the area.

I agreed to go with her since I was also itching for a quick adventure at that time, and not to mention got excited to taste some of there famous local delicacies.

Budget agreement with my best friend was 3,500php (all in) for each of us.

1ST DAY:

We boarded a Supercat Water Taxi at 9am and arrived in Iloilo City around 11am. I helped her with her work to hasten it and started our exploration right after.

We started our trip at around 1:30pm. I researched through a couple of blogs on where to go, the must try to eat. I just picked out those that i took interest in considering the limited time that we had.

I planned to visit in a “Farthest to nearest” rule, starting way down south then stopping one municipality at a time going up and finally arrived back in Iloilo City as the last place to explore.

Southern Iloilo Tour:
San Joaquin Cemetery –> San Joaquin Church –> Miagao Church –> Guimbal Church –> Tigbauan Church –> Iloilo River Esplanade –> dinner at Punot –> back to hotel

DETAILS:

Municipality of San Joaquin:

To get there ride a San Joaquin Jeepney from Molo or at the Terminal Market (locally called “Super”) near Robinsons Place Mall. Tell the driver to that you will be dropping off at San Joaquin’s “patyo” or cemetery. This will be your first stop.

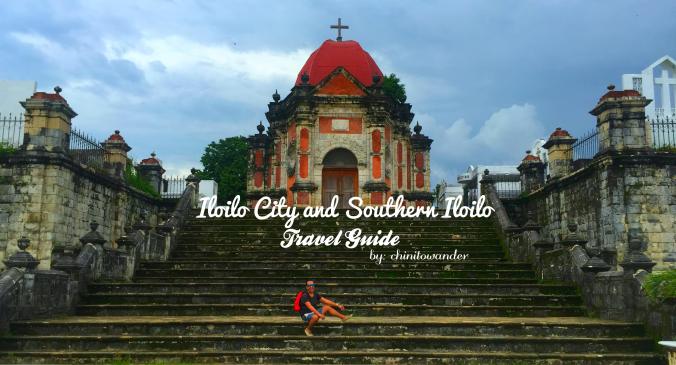
The San Joaquin cemetery, known for its imposing Campo Santo or mortuary chapel, is a Roman Catholic cemetery and perhaps the grandest and best preserved in the entire Province of Iloilo.

Seeing it truly marveled me and at the same time creeped me out a little. You’re going in a cemetery after all without anyone around in a very gloomy day. Yikes!😄

After we had explored it and did a bit of photo op (thank goodness there wasn’t anything something fishy on our photos😁), we went to San Joaquin Church.

From the cemetery, ride a tricycle (motorized rickshaw) to the town proper and tell the driver to drop you off at the church. Fare was 10php each of us.

img_4864

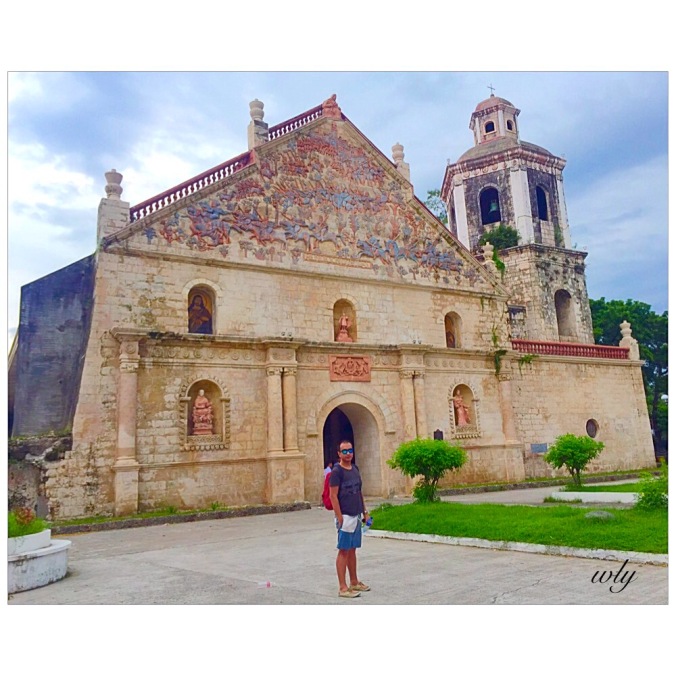
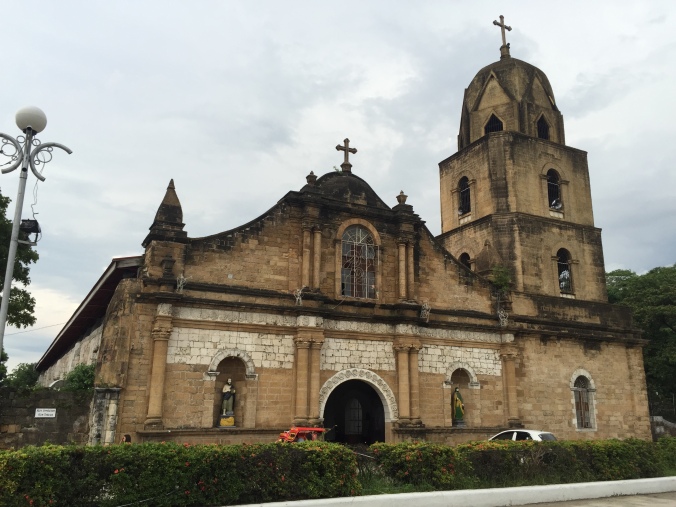
This ancient church was built in 1869 made of lime stones extracted from the mountains of Igbaras and sparkling white coral stones abundant in the shores of San Joaquin. . The church distinguishes itself from other churches in the Philippines because of its militaristic theme. Carved on a disproportionately large pediment on the facade is an intricate sculptural relief depicting the Spanish victory over Moroccan forces in the Battle of Tetuan.

The low relief mural captures the drama of victory where cavalry and infantry are tearing down Moorish defense. So intricate is the sculpture that even the expression of agony by wounded soldiers is visible. The title of the composition “Rendicion de Tetuan” is carved at the base of this animated relief.

We then proceeded to one of the only 4 Spanish-era Baroque Churches in the Philippines, the Miagao Church.

Miagao Church

To get there: From San Joaquin Church, walk or ride your way up to the Highway intersection. Ride the Mia-gao or San Joaquin Jeepney going to Miagao  Town. Just tell the driver to drop you off at the church.

According to Wikipedia, The Miagao Church also known as the Sto. Tomas de Villanueva Parish Church. It was also called the Miagao Fortress Church since it served as defensive tower of the town against Muslim raids. The church was declared as aUNESCO World Heritage site on December 11, 1993 together with other four Baroque Spanish-era churches in the Philippines.

We had a quick snack outside the church afterwards in a local food vendor who sells fish ball and local tempura then proceeded to the next church visit.

Guimbal Church

To get there: From Miagao Church, just hop on again in a Jeepney going to Iloilo City, telling the driver to drop you off at Guimbal Church.

img_4866

The Guimbal Church is one of the oldest churches in the country. This yellow sandstone church is made from adobe stones called igang and coral stones quarried from Guimaras, an Island near Iloilo City known to be the home of the world’s sweetest mangoes. It was built in 1774 by Father Campos.

The facade is a two-story affair flanked by twinned round pilasters decorated with floral carvings. Its vintage belfry is 4 stories high and doubles as a watchtower during the Spanish occupation against pillaging Moro pirates. It has undergone some reconstruction after it was destroyed twice, during the Second World War and during the 1948 earthquake. Recently, it was rehabilitated to its original structure.

We just had a quick peak then went to our last church stop which was the Tigbauan Church.

Tigbauan Church:

To get there: From Guimbal Church, just walk towards the highway and ride a jeepney goin to Iloilo City then alight in Tigbauan Church.

The Tigbauan Church is unique in the country because of its Latin American architecture. The church was constructed in 1575 and destroyed during an earthquake in 1948.

The church interior was gutted during the Second World War. Today, it has one of the most beautiful modern-type interiors made up of colorful stone murals.

After mesmerizing the murals, me and my best friend decided to get back to the city.

Going back to the city was a breeze, just get in on a jeepney to the city proper.

When we arrived back at the city and rode a taxi going to the River Esplanade to have our dinner. Famished from all the walking and exploring, our taxi driver suggested to try a certain restuarant named Punot and decided to give it a try.

img_4874

Punot Restaurant, not knowing that it was a posh-kind restaurant. Waiters where on there uniforms (well not really the suit type) but it was decent and we were just on our shorts and our backpacks. Hahaha.😁😄 We just look at each other and said “The Hell”. Hahaha

We got in and realized  while we went up to the 2nd floor area to have our seat that this restaurant is frequently dined by celebrities and public figures. It’s a modern Iloilo Cuisine Restaurant. Surprisingly, there food prices were reasonable.

We had this for dinner: From L-R: Roasted Duck in Mashed Sweet Potato, Bicol Express, Bagoong Rice.

After getting our stomachs full, we stroll along the river esplanade to digest some of the food we ate and took some photos then went to our hotel to end the day.


2ND DAY:

Brunch at Netong’s La Paz Batchoy –> coffee at Madge Cafe –> take away of Yam (Ube) Brazo De Mercedes Dessert in La Paz Bakeshop –> stopped by for Iloilo’s famous Siopao at Roberto’s –> took the ferry back to Bacolod. End of trip

Details:

Initial plan was to wake up early and have the famous La Paz Batchoy in La Paz Market for breakfast, but due to my best friend’s work that she had to talk with her boss over the phone, we got our plans delayed and instead had our batchoy for brunch.

Jeepney routes in Iloilo City are actually very easy to navigate and are accessible. Luckily, jeepney stops for Jeepney La Paz Market Loop was just a few meters away from our Hotel.

Rode a jeepney to La Paz Market while taking photos to some heritage sites that we  passed by.

After getting off at La Paz Market, you’ll be able to see a lot of La Paz Batchoy vendors. You can take your pick from Ted’s or Deco’s which is located just at the roadside outside of La Paz Market, but decided to ate at Netong’s which is located inside of the market. Netong’s is said to be the original creator of authentic La Paz Batchoy. That rich flavor is totally living up to its reputation.

img_4902

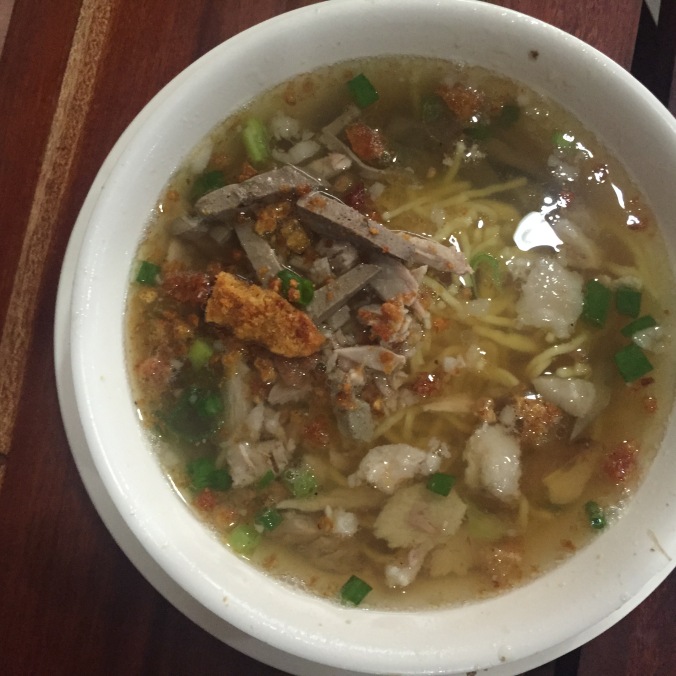
Batchoy is a noodle soup made with pork organs, crushed pork cracklings, chicken stock, beef loin and round egg noodles topped with green onions. Its origins can be traced to the district of La Paz, Iloilo City in the Philippines, hence it is often referred to as La Paz Batchoy.

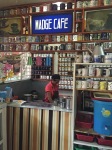
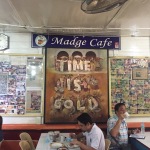
We moved to Madge Cafe afterwards to have a sip of there famous Native Coffee. I wont give you much information about this cafe, just see it for yourself. It’s definitely worth it!

Then head off to La Paz Bakeshop just at the corner of La Paz Market and bought there famous Yam (Ube) Brazo de Mercedes for take away.

After we got our dessert treat, we rode a taxi going to our last food trip shop which was Roberto’s to try there famous Siopao. Located at the downtown center of Iloilo City.

img_4915

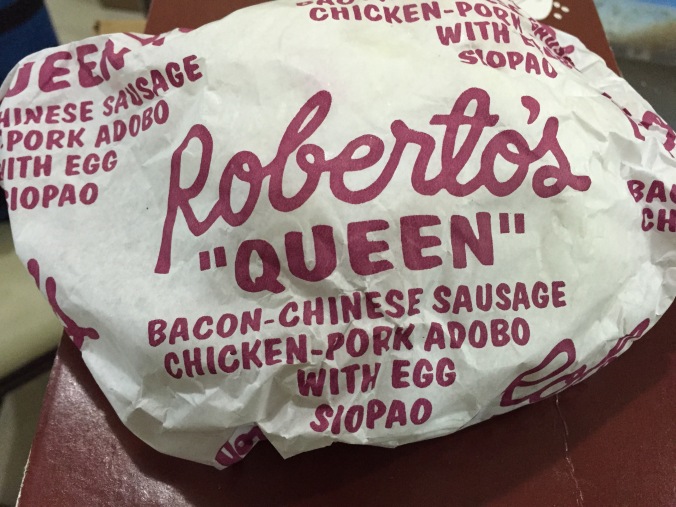
Roberto’s offer few variants of Siopao, namely: mini, The King, and the Queen. Making “The Queen” as the siopao packed with lots of everything nice. We bought one for take away also as we were still full and did not have enough time as well because our trip going back to Bacolod via Super Cat Sea Taxi was at 1pm.

Iloilo City has its history so well preserved up to the present. Roaming around the city was also quite safe, and so far, the taxis we rode on to did not scammed us. I wish to go back there soon enough and head my up to the north this time.


Chinitowanders: How I solo traveled Japan for 5 days in a budget (Budget and Tips)

collage

I never imagined the day would come when I would be traveling to Japan. There are few reasons why Japan wasn’t in my bucket list:

  1. I heard things about Japan being an expensive place to visit, and probably the most expensive place to travel in Southeast Asia especially coming from the Philippines.
  2. I haven’t solo traveled outside the country. We all know that Japan isn’t as easy to solo travel as any other Asian countries and for solo travelers who have tight budget (and for Filipinos) might be quite challenging as Japan is also quite frankly an expensive place to be comparing again to other Asian countries.
  3. I heard and I read about the complicated railway system of Japan due to a few private companies operating the railways.

Lastly, I thought that there’s nothing much to see in Japan but the cherry blossoms for which they are known (but going there during cherry blossom season is fairly expensive) and shopping (gadgets and electronic stuff).

While I am not really fond of shopping when traveling abroad, it didn’t come to me about going there. Until then, I’ve had a few people tell me that all I thought about Japan wasn’t really true and that it’s not that expensive traveling there, that if you just follow the guidelines in the railway, you wouldn’t get lost and that there is so much to see and do other than cherry blossoms and shopping.

I admit, I am not a super budget traveler. But I do budget when traveling. It’s just that I don’t have the patience to book for a seat sale. As long as I think that the airfare is worth it then I book for the trip. That’s why, in this Japan trip, my round trip airfare from Cebu to Kansai International Airport (Osaka) costs almost 12,000php already. Although, if  you’re based in Manila, the airfare will be way cheaper and could save you a lot of money and/or if you’re patient enough to wait for a seat sale.

So, it came to a point that I challenged myself to travel solo outside the country for the first time and Japan is the destination of choice. Admittedly, I almost gave up in pushing through with this trip because, when I researched about the places to go to, the transportation I needed to use all seemed indeed complicated. But I told myself “I can do this. It’s going to be an adventure.” I guess getting lost also will be an adventure. Hahaha! I just needed time to research all the necessary things that I need to know about Japan (the places I want to visit, where to stay, the mode of transportation and what to eat).  Those are the basic things that I needed to know to get me started.

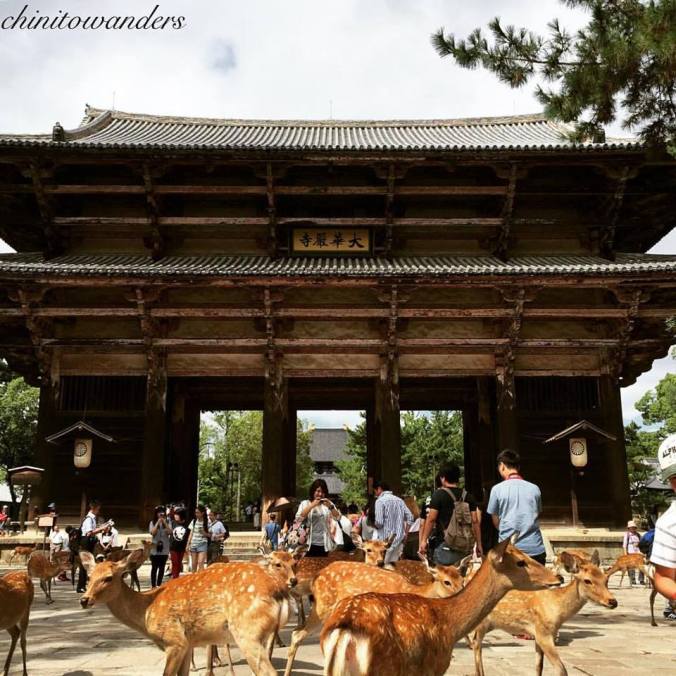
My first decision was to travel to Tokyo then Hakone to see the Mt.Fuji. But it all changed when I found out that I have a small chance of seeing Mt. Fuji without the clouds blocking its grandeur. I made further research then I read that Kansai Region, Japan has a lot of sightseeing spots and not to mention tons of food to eat. (Exciting! Hahaha!)😉😊 . Not to mention the bowing deer in Nara. So I opted and decided that I’ll travel to Kansai Region, Japan. Visiting 3 cities: Kyoto, Nara and Osaka respectively. Since those are the places that seemed to have the things that I wanted to see and do.

I finally managed to put everything up, piece by piece, and made the best itinerary I can possibly make.

First, you needed to apply for a Japan visa if you’re coming from the Philippines. Please refer here on how to apply for a Japan visa.

I had mine processed at Friendship Tours in Cebu. They are the only accredited agency to process the Japan visa directly in Cebu. Friendship Tours is located in the Oakridge, Banilad, Cebu.

MY TOTAL ALL IN EXPENSE: Php 30,672.00

Details of expenses:

  • 1,200 Php-  Japan Visa processing Fee. Have your visa be processed in Friendship Tours in the Oakridge, Banilad, Cebu
  • 11,536 Php – Total round trip airfare from Cebu-Manila-Osaka-Manila- Cebu  including 15kgs return check- in baggage (Cebu Pacific)
  • 4,696.00 Php-  Hostel (3 nights in Kyoto, 1 night in Osaka). Booked my hostels in Agoda.com
  • 3,000 Php- Total transportation allowance (train and bus)
  • 1,670 Php – Tourist Data SIM card
  • 4, 000 Php- Total food allowance for an all-out Japan Food trip.
  • 500 Php–  Entrance fee allowances to temples.
  • 1,620 Php- Travel tax
  • 2,000 Php- Souvenir Allowance
  • 450 Php – Taxi fare round trip Mactan-Cebu Int’l airport

NOTE and TIPS:

  1. Everything can be reduced in cost especially the airfare. I am from Cebu so I still needed to book a flight from Cebu to Manila since there is no direct  flight from Cebu to Osaka (Kansai International Airport).
  2. The food allowance can also be reduced if you’re not the foodie type. I went all out in eating all the Japanese food that I wanted to try. That’s the reason for the big cost. Budget food cost in Japan ranges from 100 JPY -500JPY. You can stick with convenience store food which is cheaper (7/11, Family Mart, Mini Stop).
  3. For my souvenir allowance, I was able to buy an Airport Limited edition Starbucks Tumbler, 1 Uncle Rikuro cheesecake, 1 Pablo cheesecake, 1 bottle of sweet sake, 1 Japanese transparent umbrella and a few boxes of Royce Chocolate and Mathca Kitkats.
  4. You can change your USD to JPY in the Airport. I had mine changed in NAIA 3.
  5. Ask when in doubt. The Japanese are very hospitable, honest and helpful. Although most Japanese dont know how to speak English, they will do their best to help you.
  6. Buy a tourist SIM card with data. This is very crucial as you will be using Google map and Hyperdia always in order for you to know what to ride and the time table of your mode of transportation.
  7. Use Google Map and Hyperdia in your mobile every time you ride a train or bus. These apps will tell you or advice you the best route to your destination, what to take and the train time schedules. Google Map will be very useful especially in locating the tourist spots. If ever I did not put how to locate the place in this blog, remember to just use your Google Map. Google Map is pretty accurate in Japan.
  8. The budget does not include shopping. I’m not fond of shopping when traveling outside the country. I’m foodie and a sightseer.

Flight details:

  • Departure date from Cebu: September 6,2016 –> 3:05PM-7:55PM
  • Departure date from Japan: September 10,2016 –> 8:40PM- 11:50PM

So let’s get the details started.!!

Sept.6- Arrival to Kyoto

Headed straight to Kyoto

If you are traveling from Kansai International Airport to Kyoto, then your first stop may be the Travel Desk of Kansai Tourist Information Center. This is located on the first floor of the Terminal 1 building. Inquire where you can buy the ICOCA Card + 1 way Haruka Express train going to Kyoto.

Upon exiting to the arrival hall, buy a data tourist SIM card in a vending machine located at the right side of the wing when you get out of the arrival area. It costs 3,500 JPY for 30 days with 1.5 GB data. This will be more than sufficient in your 5 day tour. Be sure to read the instructions carefully in activating the card. You need an internet to activate the card. Just use the airport’s wifi or the JR Station’s (the station is on the 2nd floor adjacent to the Kansai Airport. You may ask the Travel Information desk for direction) wifi.

After registering your Sim card, go to the 2nd floor and head to the other building (this is the JR Train station). Get ICOCA card + Haruka One way pass in the JR Office (one way only to Kyoto)  for 3,600 JPY.(1,600 for the Haruka, 1,500 credit on your ICOCA and 500 deposit). Just have your card charge an additional 2,000 JPY in advance. A total of 5,600 JPY. There will be signs leading you to the JR Office.

Please refer here about ICOCA card Information.

After getting yout ICOCA Card. Ride HARUKA TRAIN to Kyoto. Train station entrance is infront of the JR Office. Try to look for the TV Screen outside the office for the Haruka train departure schedule. You may also ask attendant in the JR Office.

When you arrive at Kyoto, check in at your hostel/ hotel. Mine was K’s House Kyoto – Backpackers Hostel. I chose to stay in this hostel mainly because of the good feedback it had from Agoda.com.  Address: 418 Nayacho, Shichijo-agaru, Dotemachi-dori, Shimogyo-ku, Kyoto, Japan

How to get to hotel from Kyoto station:

This hostel can easily be negotiated on foot from Kyoto Station. Just go out from the Central exit of JR Kyoto Station, cross the street towards Kyoto Tower and walk along Karasuma-dori (the street on the east-side road of Kyoto Tower, near Starbucks). Turn right at the intersection of Shichijo-dori and Karasuma-dori and walk for about 5 minutes until you reach Kawaramachi-dori. Cross a signal and then turn left on the first street along Kawaramachi-dori. You will find K’s House (white building) and Zen Café on the road to your right. Or you may just just use your Google Map to locate your Hostel/Hotel.
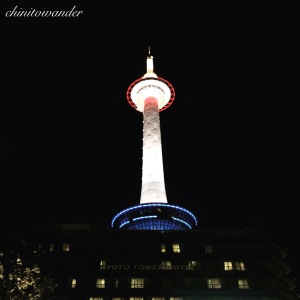
img_0335

Kyoto Tower

After checking in, tell the receptionist that you want to Get a One Day unlimited bus Pass for 500JPY. This bus pass is all you need for your Kyoto Tour the next day.  Ask for any advice for your next day’s itinerary about what bus to ride. This will help you get started. Also ask for a Bus Map and Kyoto City map.

-sleep

Sept.7: Arashiyama Bamboo Forest, Arashiyama Monkey Park & Temple Run (Ninna-ji Temple, Kinkakuji Temple), Nijo Castle & Dinner at Fire Ramen (Menbakaichidai Fire Ramen)

Woke up early and proceeded to Arashiyama Bamboo Forest. I woke up around 6:30am and left the hostel around 7am. I want to be early to avoid the crowd of tourists who might spoil my photos with lots of photobombers. Lol.😁

  • Address: 〒616-0000 Kyoto, Kyoto Prefecture Ukyo ward Arashiyama
  • Access: go to Kyoto Station by taking a bus just beside the hostel and take the JR Train (San-In Line). After alighting, it will be a 10-minute walk from Saga Arashiyama Station on San-In Line.

After I load my self with tons of photo ops.😂 I walk myself to  Arashiyama Monkey Park Iwatayama. This is the place where you get to see the Japanese macaque, the only monkey specie you could find in Japan.

  • Address: 8 Arashiyama Genrokuyama-cho, Nishikyo Ward, Kyoto City, Kyoto Prefecture 616-0007
  • Access: around 10 minutes walk from bamboo forest. If just follow your Google Map.

If you had enough with the place already. You may now PROCEED TO TEMPLE RUN:

Temple Run –all temples can be reached via bus.

My first stop was, Ninna-ji Temple 【World Heritage】(pagoda), –free entrance

  • Address: 33 Omuroouchi, Ukyo Ward, Kyoto City, Kyoto Prefecture 616-8092
  • Access: Take city bus from JR Kyoto Station and get off at Omuroninnaji-mae bus stop. 2-minute walk from Keifuku Omuroninnaji Station. If you are coming from other parts of the city, just follow the bus route and check which numbers are stopping at the same bus stop.

Second is, Kinkakuji temple (golden palace) –400JPY entrance fee

  • Address: 1 Kinkakujicho, Kita Ward, Kyoto, Kyoto Prefecture 603-8361, Japan
  • Access: Take bus numbers 101 or 205 from Kyoto Station to the Kinkaku-ji Michi bus stop. If you are coming from other parts of the city, just follow the bus route and check which numbers are stopping at the same bus stop.

Headed to Nijo Castle after Kinkakuji Temple. Refer to your bus map or google map to get there. To my dismay, the castle was closed at that time due to some reconstruction. Oh well, just don’t forget to include this in your itinerary. I read that its wonderful inside the castle. By the way, on regular days, the castle ticket office closes at 4pm. So be sure to go there before it closes.

Temples are pretty much  looks the same for me that’s why I only opted to visit two temples and the castle. Also, my feet were getting tired from all the walking but they were a sight to behold.

After visiting Nijo Palace, walk to Menbakaichidai Fire Ramen for dinner then went back to the hostel and called it a day.

Menbakaichidai Fire Ramen: Chinitoeats: My Fiery Ramen Experience. Definitely not to be missed!

Sept.8: Fushima Inari Taisha, Nara Half day tour & Gion District

Still the same routine. I woke up early in order for me to have good photo ops at the location as this place gets pretty crowded when it’s getting late just like the bamboo forest.😁😆😅

First stop was Inari shrine. Fushimi Inari Taisha in google map

  • Address: 68 Fukakusa Yabunochi-cho, Fushimi ward, Kyoto city, Kyoto Prefecture 612-0882
  • Access: go to Gion Shichijo Station (keihan Line) à Keihan Railway Fushimi Inari Station.. it’s a 5-minute walk after getting off at Keihan Railway Fushimi Inari Station- ticket price 150JPY

It was raining that day and I was just lucky that some foreigner offered to take me back to the main entrance because I was stuck in the rest room area for nearly an hour, waiting for the rain to stop. And yes, when we arrived back at the entrance, the rain stopped. Darn! I was very thankful for her. Thank you, Christine. That was her name.😊😊😐😐

Because I don’t want to get wet anymore, I bought an umbrella. And guess what, after I bought the umbrella, it didn’t rain ever since then. Darn again! Hahaha. Well, I just carried it with me and brought it back home to remind me of that day. Hehehe.😂😅😐😐

After that, I rested for a while and ate a king crab meat in a stall. Then I went my way off to Nara.😋


I’m excited that I’ll be seeing free-roaming deers!!! Weeeeh!!😜

Visiting Nara:

How to get to Nara from Inari Shrine:

From Keihan Railway Fushimi Inari Station (keihan Line-Yodoabashi) -à Tambabashi Station… then transfer to Kintetsu-Tambabashi Station using Kintetsu- Kyoto Line NOT THE LIMITED EXPRESS as limited express is not applicable to your ICOCA Card (kintetsu Nara) and arrive in Kintetsu Nara Station.

Once in Nara, you’ll most likely start this itinerary at Kintetsu Nara Station. Get yourself to the fountain just up the stairs from Kintetsu Nara Station to begin this walk.

  • Start from Kintetsu Nara Station and walk up Nobori-oji Street. You’ll start to encounter Nara’s famous sacred deers as you go.
  • Use the underground crossings to get to the northeast corner of the Nobori-oji/Route 169. Walk from there to Isui-en Garden. — cost 900 JPY entrance
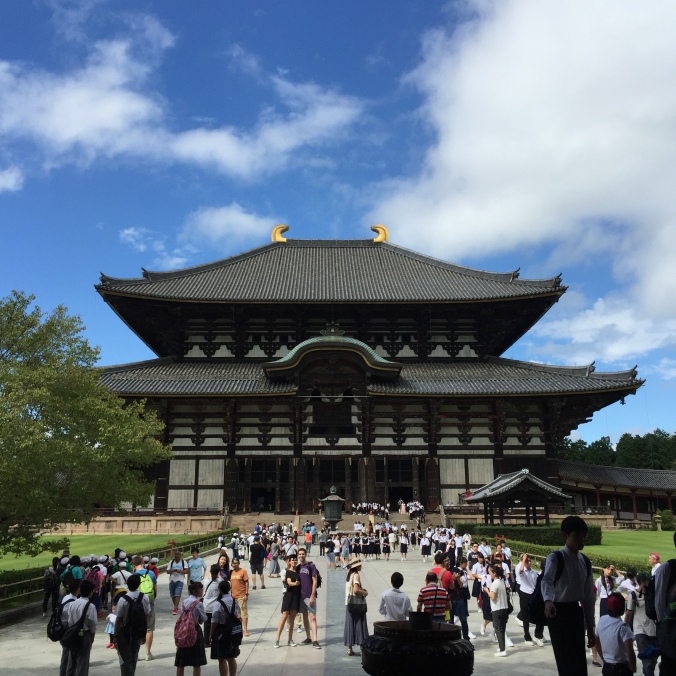
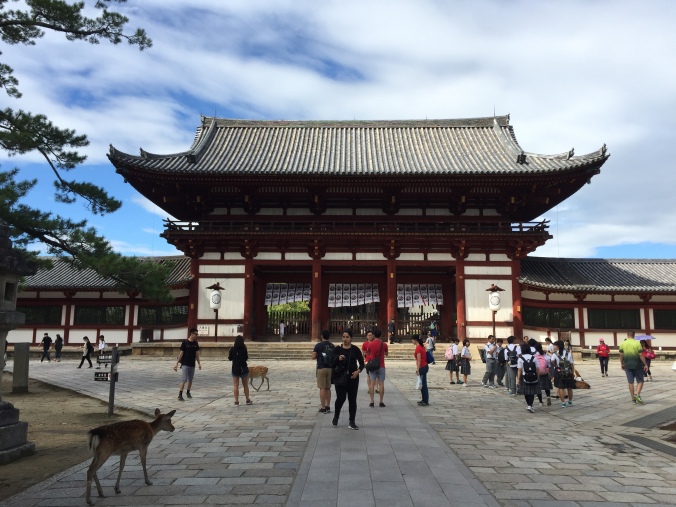
  • Walk from Isui-en along the backstreets to Todai-ji Temple. Before entering the Daibutsu-den Hall to see the Great Buddha (Daibutsu), walk a little south to check out the Nandai-mon Gate, with its two huge guardian figures.
  • Take your time marveling at the Daibutsu and then exit Daibutsu-den. Walk along the east wall of the Daibutsu-den and then go up the path that turns up to the right just past the small pond to reach Nigatsu-do Hall.
  • Check out Nigatsu-do and then walk in the direction of the base of Wakakusa-yama.
  • Follow the narrow pathways through the forest to Kasuga-Taisha Shrine.
  • Follow the main path from Kasuga-Taisha all the way west until you reach Kofuku-ji Temple.
  • Cut through the precincts of Kofuku-ji Temple to get back to Kintetsu Nara Station or JR Nara Station.
  • Note that if you’re really, really pressed for time, you can cut out the visit to Kasuga-Taisha Shrine. In this case, after visiting Nigatsu-do Hall, simply return the way you came to Kintetsu Nara Station.

Kofuku-ji Temple:


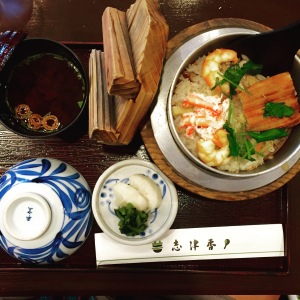
You may have lunch in between your walk. I recommend you eat at Kamameshi Shizuka. The location is just adjacent to Nara Park, you will know its the one as people queue outside the restaurant. To know more about the restaurant just refer to their website.
img_0589

My Kamameshi Nara Special

After visiting Nara, proceed to Gion neighborhood & Yasaka Hall Gion Corner. Now time to hunt for some geisha.!!.😁

  • Address: Yasaka Hall Gion Corner
    Yasaka Hall, 570-2 Gionmachi Minamigawa, Higashiyama ward, Kyoto city, Kyoto Prefecture 605-0074
  • Access: 1-minute walk after getting off at Keihan Gion Shijo Station.

Upon arrival in Gion Shijo Station, there will be Tourist Information center. You may ask some details where you might spot an actual geisha and visit other sites or where you can have the best Okonomiyaki in Kyoto or where the best place to have some dinner. The attendant is very knowledgeable so take it from her.

What to eat in Gion?

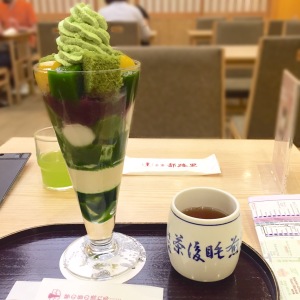
-Gion Tsujiri –matcha dessert shop in Gion. Eat Tokusen Tsujiri parfait / ¥1,383
img_0628

– Issen-Yoshoku Okonomiyaki

A ¥680 okonomiyaki may seem pricey at first – but the generous amount of ingredients in this savoury pancake fully justified its price and should be on your must-eat list! Exploding with ingredients, the okonomiyaki resembles a huge overflowing pancake.

Cost: ¥680
Opening hours: 11:00am – 3:00am (except sundays close at 10pm)
Address: 238 Giommachi Kitagawa, Higashiyama-ku, Kyoto 605-0073, Kyoto Prefecture 〒605-0073東山区祇園町北側238番地
Nearest station: Gion-Shijo station (祇園四条駅)

*back to hostel

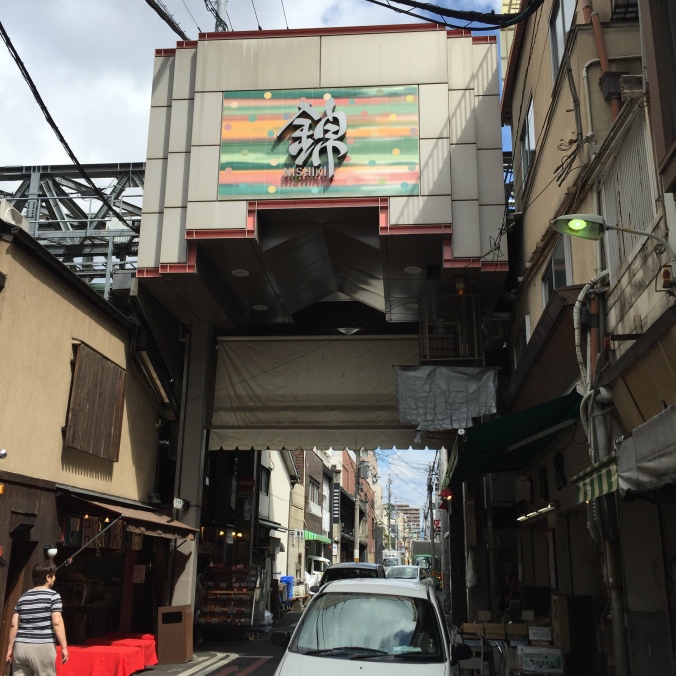
Sept.9: Nishiki Market , travel to Osaka, Dotonburi & Shinsaibashi

This time I woke up at 8:30am. A bit late since I needed a bit of rest from a fully packed itinerary and since my plan was just to stroll along Nishiki Market and have a good time eating freshly made/cooked foods.😋😋😋😋😋
img_0644

I checked out and left my luggage in their storage room before I went to Nishiki Market. I walk my way to Shijo Station which was about a five-minute walk from the hostel then hopped on a train to Gion-shijo station (the nearest station to Nishiki Market).

Alighted at Gion-Shijo Station then walked my way to the market after which I started my quest for good food.

Refer to my blog for foods that you should try while in Japan:

Chinitoeats: Food Trip – 17 FOODS that you should not miss when in Kansai Region, Japan

After I had a very good gastronomic activity, I went back to my hostel to freshen up a bit, got my luggage and went on my way to Osaka.

Afternoon:

GOING TO OSAKA.

I booked one night stay in Osaka at Khaosan World Namba Hostel. I have read good feedback about this hostel and surprisingly near to subways and even JR Bus Station going to the Airport. So I think its an added bonus for its location. Though this hostel is pricier than the average hostel in Osaka, but it has its reasons as to why. You can read some feedback in Agoda.com

HOW TO GET TO Khaosan World Namba Hostel from Kyoto:

Use Google Map. Google Map will show you the fastest route going to your hostel from Kyoto, just carefully follow it.

Upon arriving at the hostel, I checked in and  then asked the receptionist for some advice on places to go. You may ask for a Osaka map from them for free. I went up to my room, rested for a bit before I went on strolling around Dotonburi/ Shinsaibashi.

After I rested, I started my walk to Dotonburi. Dotonburi area might be the center kitchen of Japan. The area has tons of restaurants, food stalls and everything about Japanese food is there. Go in an all out food spree! 😆😁😋😋😋

Along the neighborhood are Shinsaibashi and Umeda wherein in there are tons of boutiques to shop in. If you want to buy some souvenirs, go to Tenjinbashi.

What to eat:

Creo-Ru Takoyaki, Japanese Dango, Taiyaki, Tako Tamago in karamon market, Kura Sushi etc. or refer to the links below:

Chinitoeats: Food Trip – 17 FOODS that you should not miss when in Kansai Region, Japan

Chinitoeats: Fugu – eating the world’s most poisonous fish

Chinitoeats: Piere Lotti- an Ice Cream that actually stretches!!

What I ate when I was there:

2 kinds of Takoyaki, a korean inspired ramen, Fugu, Piere Lotti Ice Cream and lots of ready to eat foods in convenience stores.

I went back to my hostel almost midnight just when my feet was like falling apart from all the walking, but it was fun! Really fun!

Sept.10. check out, Osaka Castle, Shinsaibashi, Dotonburi, back to hostel & depart to Airport

I woke up at around 8AM and had breakfast inside the hostel. I just bought food from Family Mart the night before and placed it in the fridge and have it heated up by the morning.

I had an early check out and left my luggage at the hostel while made a last minute strolling in Osaka. I visited Osaka Castle. Again, just use your google map for the fastest route for you to get there.

After I was done wandering around Osaka Castle, I went back to Dotonburi area for some last minute souvenir shopping and food trip.

I went back to hostel before 2pm and collected my luggage then headed to OCAT JR Namba Bus Station for a limo bus to the airport. It is located just one block away from the hostel. It’s very near. You may ask the receptionist for the detailed instructions to locate the building but it’s very close. The bus station is on the 2nd floor of the JR Building.

After getting on the 2nd floor of the JR Station Building, you will be able to see a ticketing area where you can buy your bus ticket going to the airport.

In a flash, I was already going back to the Philippines. It was a pretty short five-day trip with actually just four whole days to explore Kansai Region but it was definitely a one of a kind experience. Yes,in my experience it may be a bit more expensive to travel in Japan that any other Asian country I’ve been to but you would be amazed not just because of the scenic spots or the food but you can also appreciate how rich there culture is, how they value and preserve it. I made lots of great memories and tons of checked items off the bucket list. Hehehe. I hope I will be able to go back to Japan again, and this time, it will be Tokyo and also to see the famous Mt. Fuji.


Chinitoeats: Food Trip – 17 FOODS that you should not miss when in Kansai Region, Japan

wrq

If you happen to plan a trip to Kansai Region, Japan, food is one of those things that you should consider hunting down. While there are lots of tourist spots you could see in the region, you can’t help but divulge and indulge yourself with mouthwatering dishes.

When I travel, I do so because I am motivated by two things: Tourist Spots and FOOD! I want to put emphasis (thus, the all caps) on the word because simply because I love food. That’s it. Period.

Listed below are the dishes that you should not miss when you find yourself in Kansai Region, Japan. Most of them are locally invented and made.

Prepare to drool!

1.SUSHI

This is first on the list because obviously  Japan is famous for it. There have been numerous blogs stating good restaurants and even conveyor belt restaurants but for me, nothing’s better than the sushi that come from the wet markets as they have the freshest meat which they use to garnish the sushi with.

img_0664

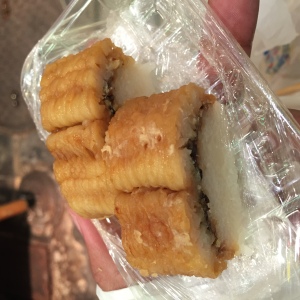
my Unagi Sushi that I bought. Costs 400 JPY

Location: Nishiki Market, Kyoto, Japan. Nearest train station is Gion-Shijo Station

2. RAMEN

My ramen experience was especially unique. If you happen to include Kyoto on the places you will be visiting in, try to dine in this restaurant.


Full detailed story here: Chinitoeats: My Fiery Ramen Experience. Definitely not to be missed!

3. MATCHA DESSERTS

Japan is known for its matcha desserts. The Japanese kinda invented it after all.. There are wide array of matcha dessert that you can try. Here are few matcha desserts that I tried and loved:

img_0449

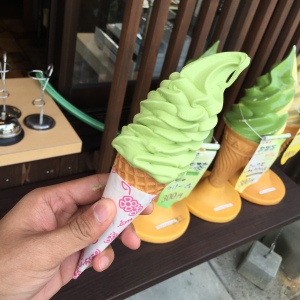
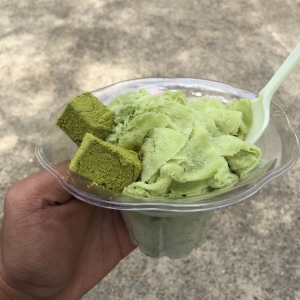
-Matcha Soymilk sundae near  Arashiyama Temple in Kyoto which costs 300 JPY

img_0628

Tokusen Tsujiri Parfait

-Saryo Tsujiri – a famous matcha dessert shop in Kyoto. Try there Tokusen Tsujiri Parfait. Its the most popular item in there menu. It uses a total of 11 different types of ingredients such as sherbet, cream, and jelly that uses matcha etc. It allows you to enjoy a variety of textures and sweet flavors.

They also sell packed teas and matcha of different flavors.

Below is a detailed information about there shop:

Categories Matcha/Green Tea
Phone +81 075-561-2257
Address 573-3, Giommachi Minamigawa, Higashiyama-ku Kyoto-shi, Kyoto, 605-0074
Directions 8-minute walk from Hankyu Kawaramachi Station
5-minute walk from Keihan Gion Shijo Station
Hours 10:00~22:00 (Last order at 21:00)
Last order on Saturdays, Sundays and holidays: 8:30 p.m.
Reservations No reservation needed
Closed Open everyday
Notes There are often lines all day on weekends and holidays. On weekdays it gets crowded after lunch at 2:00 p.m.
Price range
¥1,000 ~ ¥3,000
Credit cards Not accepted
Menu  English, Chinese
Languages spoken    Japanese only, a little English
Number of seats 72 seats

img_0584

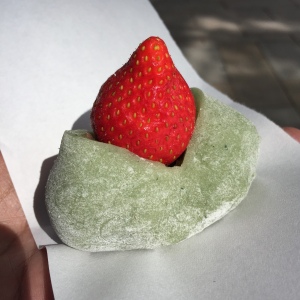
-Matcha Sticky Rice Ball stuffed with Red bean Paste topped with fresh Amao strawberries, which are the best strawberries in the country. I had this when I was in Nara. It can be found in the intersection going to Dondaimon Gate.

img_0780

-Matcha Shaved Ice. It has a refreshing taste and best indulged during summer

Location: I bought mine in Osaka Castle area

Price: 500 JPY

Note: There are plenty of matcha dessert shops that are scattered around Japan. Tap on your adventurous side and have a go on what they’re offering.

4.  Kyoto’s Famous version of its Okonomiyaki – Issen-Yoshoku Okonomiyaki

A ¥680 okonomiyaki may seem pricey at first – but the generous amount of ingredients in this savoury pancake fully justifies its price and should be on your must-eat list! The okonomiyaki resembles a huge pancake that, when eaten, simply explodes with different flavours. It’s like a party in your mouth!

Cost: ¥680
Opening hours: 11:00am – 3:00am (except sundays close at 10pm)
Address: 238 Giommachi Kitagawa, Higashiyama-ku, Kyoto 605-0073, Kyoto Prefecture 〒605-0073東山区祇園町北側238番地
Nearest station: Gion-Shijo station (祇園四条駅)

5. Dango

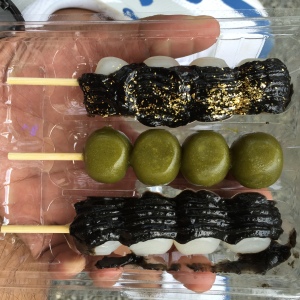
This is actually a sticky rice ball skewered in a stick. It may be grilled or just sold directly. It may also be brushed/coated with a flavored paste or just plain. You can choose as there are few varieties of it. You can find this anywhere around Japan. Photos below are those dangos that I’ve eaten:

img_0476

From top to bottom: Dango brushed with black sesame paste sprinkled with Gold dust, Green tea Matcha Dango and Dango brushed with black bean paste.

img_0561

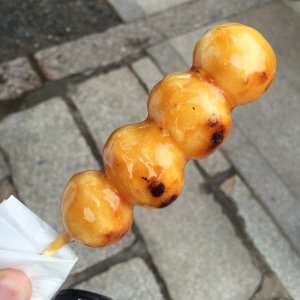
Grilled Dango dipped in a honey-like sauce.


6. Konnamonjya Soy Milk Doughnut

This is best eaten hot. It is a soft and flavorful mini Japanese doughnut.

Cost: ¥300 for 10 mini donuts (plain)
Opening hours: 10:00am – 6:00pm
Address: Nishiki Market 錦市場
Nearest station: Gion-Shijo station (祇園四条駅)

7. Japanese Pickled Cucumber

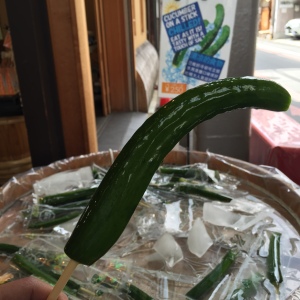
This is a good snack. Unlike most pickles that I know which are sweet and a bit sour, Japanese pickled cucumbers are more on the salty side. It is crunchy and I bet it is full of nutrients.

img_0645

Cost: ¥250 a piece. Prices may vary on size
Opening hours: 10:00am – 6:00pm
Address: Nishiki Market 錦市場
Nearest station: Gion-Shijo station (祇園四条駅)

8. Japanese King Crab Meat

Now, this one’s a delight. This is sweet, tender and juicy if I may say so. Flame- grilled, the succulent taste of the crab is definitely a hit. I had this one outside Fushimi Inari Shrine. Costs 500JPY.

9. Kamameshi Shizuka Nara Special

img_0589

Kamameshi (釜飯) literally translates to “kettle rice” and is a traditional Japanese rice dish cooked in an iron pot called a kama. Kamameshi originally referred to rice that was eaten communally from the kama. By cooking the rice and various ingredients in an iron pot, the rice gets slightly burned at the bottom which adds a desirable flavor to the rice.

Waited in line for about half an hour for this. It may take longer during peak lunch and dinner hours. The Kamameshi Shizuka restaurant is well- known throughout the Nara Region for its excellent Nara special hot pot. This consists of: shrimp, crab, conger eel, spring chicken, bamboo shoots, burdocks and carrots.

Name of Restaurant: Kamameshi Shizuka

Price: 1,280 JPY
Location: Adjacent to Nara Park. You will know it is the right one when you see a queue of people waiting.

10. Tako Tamago

Too cute to eat. This is a known Japanese street food. These glazed baby octopuses have whole quail eggs stuffed in their heads. They are tender, delicious, and inexpensive.

Location: Nishiki Market, Kyoto. It may also be available in Kuromon Market in Osaka but when I went to Kuromon Market around 4pm, there weren’t much food left to be sold already. Guess I missed the peak hours.

Price: Price ranges from 200 JPY -500 JPY depending on the size

11. Kobe Beef

Not to beat around the bush but I’m not a fan of beef. However, this one is one of the most divine edibles that one could ever eat. Everything you heard about Kobe beef is all true. It is that good.

Refers to beef from the Tajima strain of Wagyu cattle, raised in Japan’s Hyogo Prefecture. According to rules as set out by the Kobe Beef Marketing and Distribution Promotion Association. The meat is a delicacy renowned for its flavor, tenderness, and fatty, well-marbled texture. A certificate will be given to those who sells this kind of beef. With a meat quality score of A-5 (highest quality rank) it is fairly expensive, if not the most expensive kind of beef in the market.

To know more about Japan’s Kobe Beef. Click here.

“It doesn’t matter if I haven’t been able to eat a large size of this meat due to budget constraints for as long I’ll be able to have a bit to taste then I’ll be at peace.”, I had then told myself.

I had a small skewer of this beef which  was perfectly grilled in Nishiki Market. It costs a whopping 1,000 JPY a piece. Here’s a picture of what I bought:

12. Sweet Sake

img_0660

A Japanese Rice wine. When you’re anywhere in Japan, do not miss to have a sip of sake even once. I bought 1 bottle to have it as a “pasalubong” for my dad.

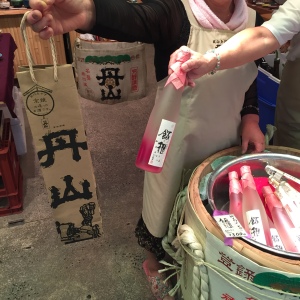
Location: practically anywhere in Japan but I Bought mine in Nishiki Market. They also provide free tasting of different sake.

Cost: It depends on the quality and the kind. I bought mine at 1,300 JPY

13. Takoyaki

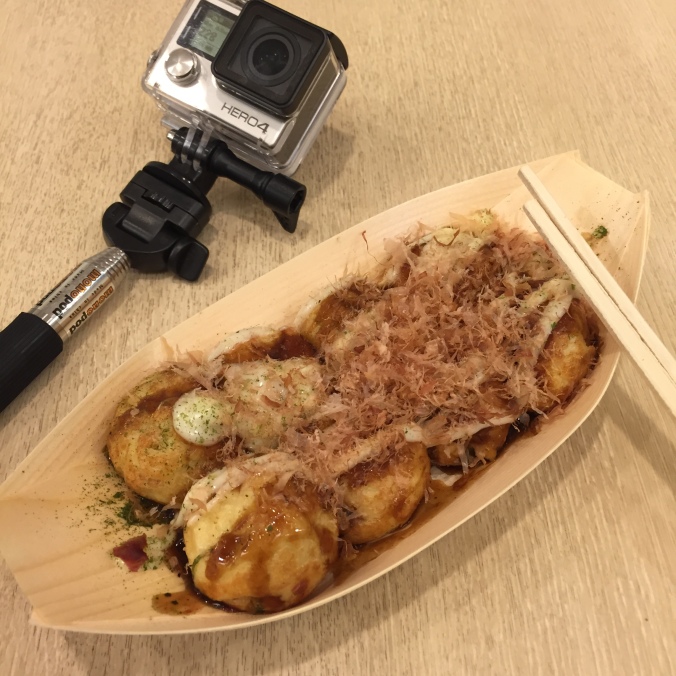
This is one of Osaka’s famous dishes. It is a round Japanese snack made out of a wheat-flour-based batter and filled with diced octopus, tempura scraps, pickled ginger and green onions. It’s then brushed with takoyaki sauce and mayonnaise before being garnished with green laver and shavings of dried bonito. As it is cheap and delicious thus takoyaki stands are pervasive in the Dotonbori area.

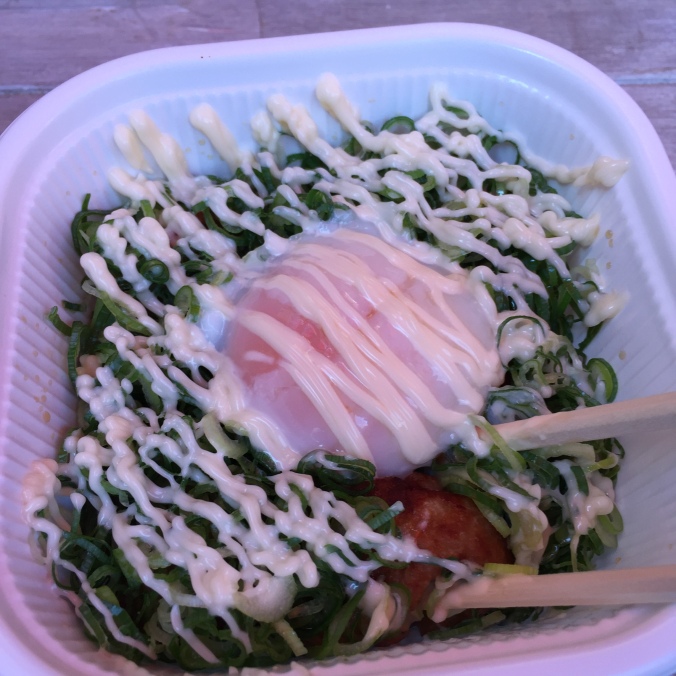
I was able to sample the takoyakis of two of the most famous takoyaki stands in Osaka. One is the Creo-Ru Takoyaki (the one with soft boiled egg on top) and the one that’s more classic (I forgot the name of the stand). I concur that the latter is more yummy though Creo-Ru is a more popular stand.

14. Hiyashi Ame

img_0665

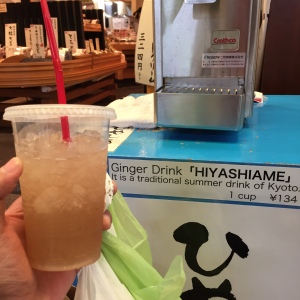
I read about this in a blog when I reasearched about what Japanese food to try when in Japan. It’s a famous summer refreshment drink in Western Japan. It’s a cold ginger drink. It is like “salabat” here in the Philippines but served cold.

15. Pablo Cheesecake

This is Osaka’s famous cheese tarts. Cheese lovers should rush for this one. Pablo is well known for their signature freshly-baked cheese tarts–deliciously soft and creamy treats that taste like no other cheese tart you’ve probably ever had before. Aside from the classic six- inch cheese tarts, they also sell mini cheese tarts in different flavors.

Location: Shinsaibashi Area, Osaka, Japan

Price: 680 JPY for the 6-inch classic Cheese Tart and 240 JPY (if I’m not mistaken) for there mini flavored cheese tarts.

16. Uncle Rikuro Cheesecake

This is probably the world’s softest and fluffiest cheesecake I’ve ever encountered. It is said to be the best Japanese cheesecake.

Check this video to see how fluffy and wobbly it is!

Location: you can find it in Dotonburi, Osaka area. You may use your google map to find this bakery.

Price: 675 JPY

17. Fugu

Read my full story here: Chinitoeats: Fugu – eating the world’s most poisonous fish

img_0687

The last but certainly not the least. The most controversial food that I challenge myself to eat. Fugu also known as Blowfish or Pufferfish. Only skilled Japanese Chefs are allowed to prepare this. Please read on my other article as to why.

My video about fugu. Click here.


After my five- day sojourn in Kansai Region, Japan, I realized that, unsurprisingly, a huge portion of my budget all went to FOOD! Hahahaha. 😅😅 That being said, I think it was the best way to spend my money with. It is all worth it. 😁😁

There might be other specialties I was not able to eat but I guess it calls for more reason to go back again soon. 😂😂


Chinitoeats: Fugu – eating the world’s most poisonous fish

14374767_10154554645869168_1377516451_o

Since I was little, I already knew what Fugu is,  considering how I loved watching Animal Planet as well as Discovery Channel. The episodes I watched talked about the fugu which is otherwise known as the puffer fish or the blowfish, how the Japanese prepare the fish and how deadly it is when incorrectly prepared.

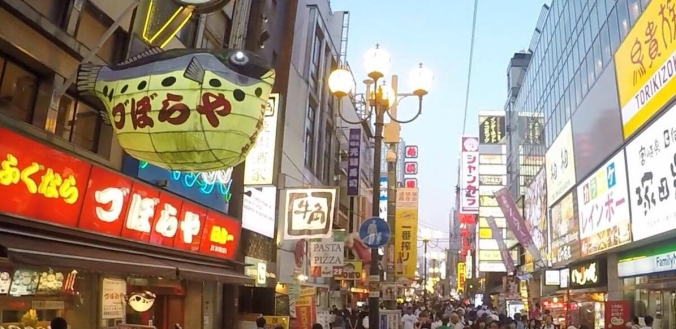
It has always been my dream to see the actual delicacy and try it! When I had fixed my plan to travel Japan, I immediately researched where in Osaka I will be able to taste this exquisite yet deadly fish. Then I read that there are quite a few restaurants in Dotonburi area that offer this kind of fish in their menu. All you have to know is that they have Puffer fish lanterns outside their establishment.

Immediately, after I arrived in Osaka, I went straight to Dotonburi in search for this. Well, it’s not that hard to find actually. When I was there, I think I saw at least 4 restaurants that sell this. By the way, this is what Fugu (blow fish) looks like:

Cute isn’t it?

I love food, and I am also adventurous when it comes to eating exotic dishes. So this one is absolutely one item on my bucket list of exotic delicacies to try.

Fugu contains a powerful neurotoxin that’s 1,200 times stronger than cyanide. There is currently no antidote for its poison. How’s that for adventurous?

If prepared incorrectly, symptoms from ingesting a lethal dose of fugu’s tetrodotoxin may include dizziness, exhaustion, headache, nausea, and difficulty breathing. Unable to speak nor move, the victim remains conscious until breathing stops and asphyxia begins.😉

The average fatality rate of fugu poisoning in Japan is roughly three deaths out of an average 49 annual poisoning cases, according to statistics. It’s a discerning number but I don’t think it’s too alarming considering that almost all of those deaths involved fishermen eating their own catch without the expert knowledge on how to prepare the fish.

With strict regulations mandating that chefs go through an extensive training program, restaurant goers have little to fear these days.

Well, at least that’s what I told myself.

Actually standing between 2 restaurants that specializes Fugu, I was memontarily unsure if I should try it. I just told myself, “The heck with this! I’m already here. I can’t back out now.” Then, I chose the one that offers a set Fugu Meal and went inside.

This is all or nothing.!

Let’s eat! 😁😉😆

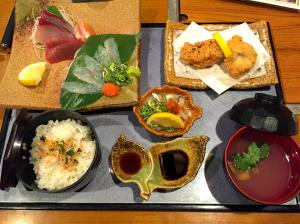
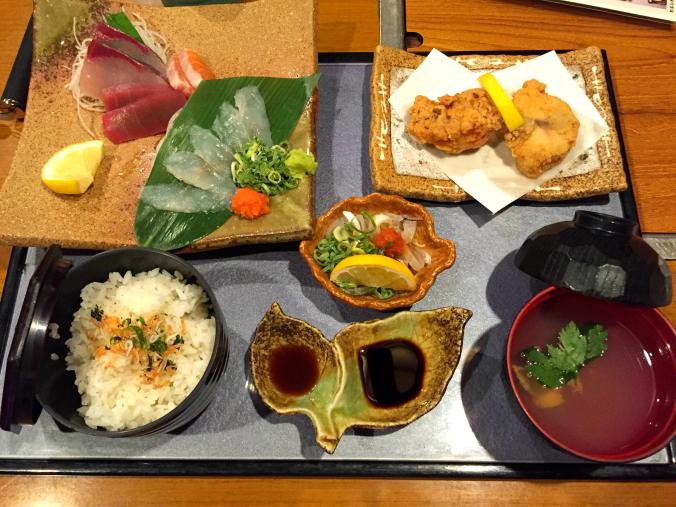
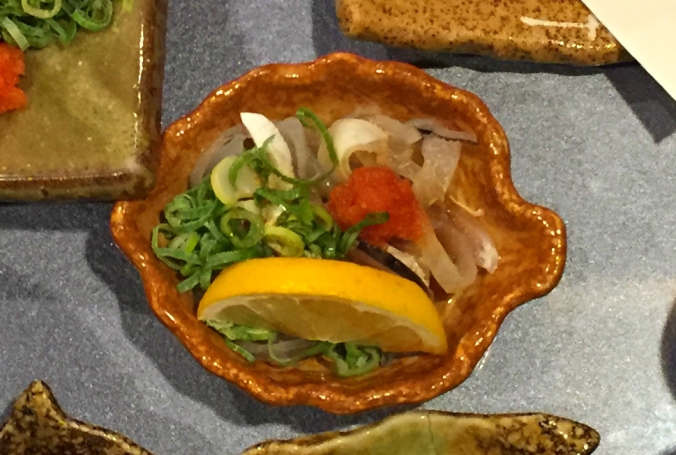
So, I ordered, anxious to taste it. When it arrived, it was beautifully presented. I had the Fugu Set meal which comprises of: Salmon Sashimi, Tuna Sashimi, Fugu Sashimi (which was expertly sliced), Fried Fugu, Fugu skin Salad, Fugu soup and a fragrant rice. This is how it looks:

img_0687

My Fugu Set meal

Watch my fugu experience here.

I tasted the Fugu sashimi first. I don’t know if it was my severe anxiety that sunk in but I suddenly felt a numbing sensation in my legs, then came the sweating and a slight difficulty in breathing. It came to me that maybe these are the signs and symptoms of poisoning. I was more nervous now. Funny as it may seem but I started panicking . I began messaging my friends and family back home, telling them that whatever happens to me, it was all because of the fugu I ate. Hahahaha!

After which, it dawned to me that if something were to actually happen to me, it will be my loss since I would not be able finish my meal. Hahaha! So there, I ate the whole thing! I  took a deep breath. Slowly, the symptoms subsided. Hahaha! Maybe it was just anxiety. After all, I’m still alive,right? . LOL. 😅😅

It is true: the fugu sashimi itself was close to near being tasteless. The fried fugu is crunchy and flavorful though. But then, it’s really not all about the taste. Sometimes it’s about the art of how it is tactfully prepared that gives a dish it’s appeal.

If someone asked me if I tried this, I’d say , “Been there done that. But… I would not dare to try it again!”. Bwahahaha. The feeling of uncertainty when I ate it was immeasurably out of this world. It was just as they say , ” When you eat Fugu, you get to play with death itself”.

It’s a once in a lifetime experience for me. Though it will not stop me from eating more exotic foods, I would not eat this one again! Maybe.😉


So, I dare you to try it! 😈😁😁😁


Name: I forgot to ask the name, but its the restaurant after Zuburaya which specializes in fugu but they don’t have the set meal that’s why I chose the latter.

Location: Dotonburi area, Osaka, Japan

Price: 1,650 JPY


Chinitoeats: My Fiery Ramen Experience. Definitely not to be missed!

img_0840

This Ramen is on FIREEE!!

I came across this flaming ramen house in my Facebook news feed. It was suggested to me by tripadvisor.com. I don’t know how it showed up in my feed but maybe it’s because my Facebook automatically detected my location that time, which was Kyoto. I ignored it, at first, as it wasn’t in my to do list until it showed up again. I initially planned that, if ever I’ll eat ramen, I’ll eat at Ichiran Ramen, a chain of Japanese ramen houses that has single cubicles so diners can really concentrate and appreciate solely the ramen solely while eating (another must try by the way while you’re in Japan).

It wasn’t until around 3pm, after my Golden Pavillion sightseeing, that I decided to pay a visit to this one of a kind ramen house. I arrived around 4pm at the ramen house. Keeping in mind that they’ll open at 6pm, I went to Nijo Castle to stroll. Unbeknownst to me, you actually need to get a priority number to dine in the ramen house. That, and because I neglected to read the sign that said so.

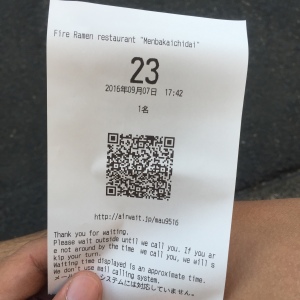
When I got back, there was a couple  who were in queue already and they told me that I should get a priority number. I was saddened especially since the priority number I got was  #23.😡😡 I just prayed that hopefully those people whose priority numbers were before mine wouldn’t show up until way after the restaurant opens.

img_0479

my priority number.  ='(

As luck would have it, the restaurant opened at exactly 6pm and there were only five of us. Luckily, I am one of those customers who were catered first. The restaurant was packed with tourists outside already after I had my dinner. Ahahahaha. *grin. Well, I waited for almost two hours for this so I guess the heavens were on my side.

This ramen house caters up to 12 customers at a time. That is how intimate your ramen experience will be. Until then, all other customers should wait outside and get their priority number. They do not accept reservation.

img_0480

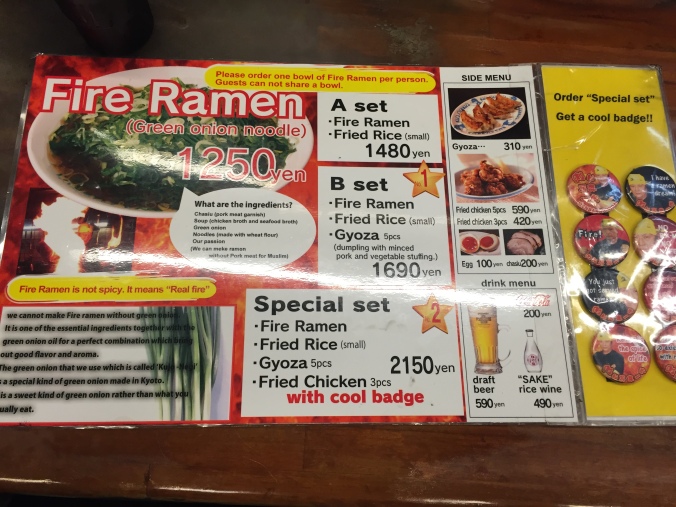
there menu

My Experience:

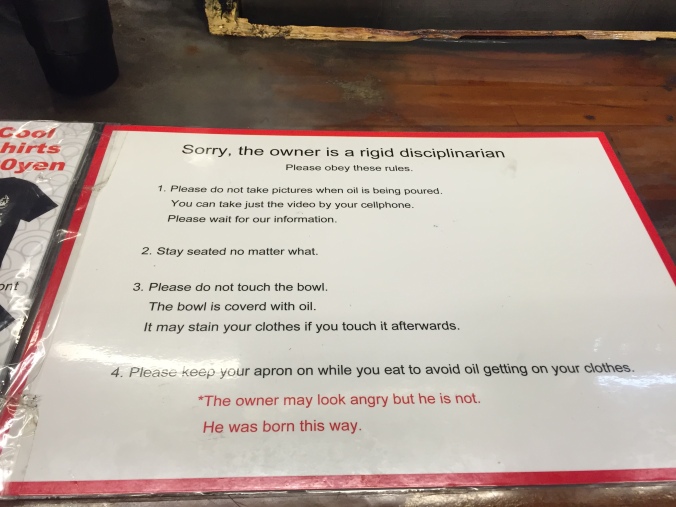
Upon entering, you will be greeted by the chef himself and his staff of two. You will then be assisted to your assigned seats. Once you are seated, they will provide you with the necessary instructions, rules and what to expect in this flaming ramen experience. After which they will give you an apron for protection. For women with long hair, they will give you a rubber band/ scrunchie for free to tie your hair. After which they will ask to have your camera phones for them to video your experience. They have a phone stand just across the table far enough not to get caught by the fire but close enough to document your experience.

img_0481

Rules of the house.

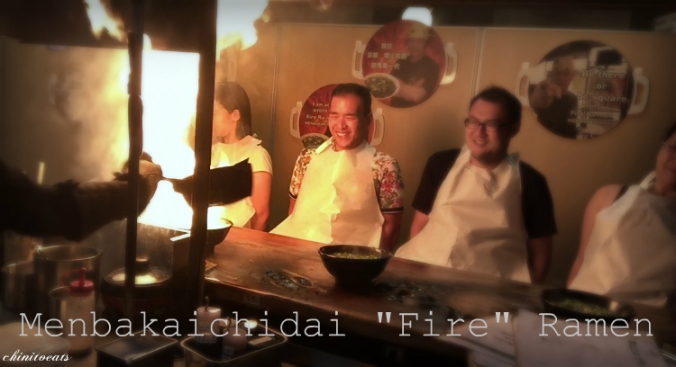
Then the show begins! They start off by covering the bowl with oil then filling your ramen bowl with noodles, roasted meat and soup then placed in a heaping amount of Kyoto’s special spring onions. It is said that these spring onions are only grown in Kyoto and are essential for the ramen be on fire (maybe because of a chemical change that will happen when a hot oil is poured but I’m not sure). Then the chef prepares the hot oil and pours it over your ramen. And bam! This ramen is on fireeee!! This ramen is on fireeee!!! (with Alicia Keys’s  “This Girl is on Fire” in mind). Hahaha! Lol! 😂😂

Watch how they set my ramen on fire here.

DCIM100GOPROGOPR3224.

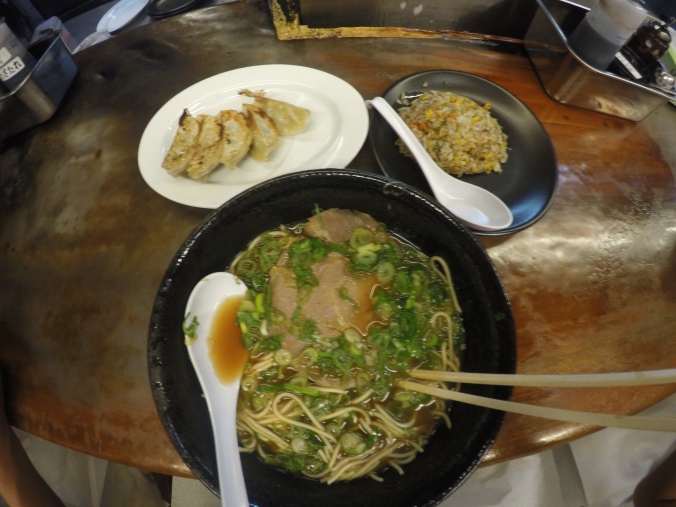
This is what I ordered. The set B.

After the ramen was set on fire, we were immediately given a pair of chopsticks and a spoon. Included in my ramen were five pieces of gyoza and fried rice. Both the gyoza and fried rice were quite good. While eating, the chef interacted with his diners. He also took some photos of us while we were eating the ramen . Here’s my take:     😝


The ramen taste? It was dangerously good. It’s not like most ramen that I tasted here in the Philippines which are salty and too oily/fatty for my taste. Though taste differs from person to person, this one was definitely to my liking since they are using chicken and fish broth for their soup which I find light and full of flavor. The famous spring onions add flavor and aroma to the ramen, too.😋😋

My last thought, as per  the chef’s motto: “No Ramen, No Life.”

Name of Ramen House: Menbakaichidai Fire Ramen House

Location: 757-2 Minami Iseyacho, Kamigyo-Ku, Kyoto 602-8153, Kyoto Prefecture (a 10 minute walk from Nijo Castle. You may use google map to locate this establishment, that’s what I did.)

Opening Hours: 11:30 am – 2:15 pm
                                6:00 pm – 11:00 pm